The Future of DevOps for Various Industries: 2024 and Beyond

As industries evolve with the changing trends in technologies and customer behaviour, DevOps will emerge as an essential practice for organizations to deliver quality user experiences with efficient time-to-market. Now, it is not just about automation but has gone beyond imagination. Top technologies like Artificial Intelligence, Cloud computing, and Chatbots have taken center stage in every industry by integrating with DevOps culture.

So let us quickly understand how DevOps will influence the future of various industries in 2024 and beyond.

IT Industry

DevOps can simplify and automate various operations with the power of comprehensive tools and technologies. The future of DevOps in the IT industry is bright and ever-shining. As DevOps is becoming more popular, companies are looking forward to hiring top DevOps professionals who can coordinate development processes and operations. These DevOps engineers are expected to automate tasks, monitor, and control the complete process starting from development to deployment. Skilled engineers will be hired to identify forthcoming challenges on a proactive basis and handle the technical and non-technical aspects of a software development cycle.

Healthcare

Healthcare

Implementing DevOps in the healthcare industry will be observed in the form of comprehensive integration of AI and machine learning. By assimilating these technologies with DevOps, the industry will be able to streamline processes and change the way professionals analyze healthcare data. There will be a range of new features that will enhance diagnostic accuracy and create better treatment strategies.

Telecommunications

A lot of telecom companies have shifted to cloud-based networks in recent years. In the future, there will be less need for on-premise infrastructures and all network services will scale up rapidly. The power of cloud computing and the practice of DevOps will shape the future of telecommunications in a new way. Telecom companies will practice DevOps to reduce costs, minimize manual interventions, reduce waste of resources, and improve resource utilization. As DevOps tools and technologies will take over bringing in automation in this industry as well, several telecommunication giants will shift towards efficient resource management solutions that are provided by DevOps thereby delivering better quality services.

Hospitality

Hospitality industry is one of the ever-evolving industries that has a promising future in the years to come. By practicing DevOps, the hotel industry and its big companies can deliver high-quality services and can automate regular workflows, allowing the staff to focus on building sustainable relationships with customers and stakeholders. Also, by integrating Artificial Intelligence with DevOps, hotels can predict consumer behaviour, create data analytics, and generate more revenues.

Insurance

The insurance sector has already begun adopting DevOps practices through conventional patterns by automating several processes that are time-consuming or difficult for humans to function with. Starting from claims processing to underwriting, DevOps implementation can automate workflows, reducing human effort and promoting productivity within shorter timelines. In the future, insurance companies will provide core services like websites, and mobile applications, at a much higher level than available at present. From making premium payments to settling claims, DevOps will improve several processes.

Banking
Banking

The banking and finance industry has already adopted DevOps culture into their workflows and operational systems. The possibilities of obtaining faster feedback loops and frequent deployments through DevOps have enabled banks to release software quickly and make iterations in between without disrupting the ongoing services. Banks are relying heavily on DevOps for IT infrastructure as they are supposed to adhere to strict rules and regulations like the Payment Card Industry Data Security Standard (PCI-DSS).

Moreover, several traditional banks are now realising to improve their pace for better market reach. As DevOps offers agile methodologies for quick deployment, banks can launch new features and stay ahead of their competitors. They can also improve their work efficiency by reducing manual processes, cutting down siloed teams, and controlling the impact of legacy systems. With DevOps, now and in the future, banks can deliver new products and services at a much faster pace than anyone could ever imagine.

Inventory Management

DevOps has widened its influence from using a specific set of tools to helping big enterprises transform their businesses with innovative functions and activities. This includes product development, customer service, marketing, and sales alos. There are other areas where DevOps has created a revolution in the field of inventory such as IT operations management, quality assurance, project management, security engineering, and human resources.

Manufacturing

It has been a while manufacturing industry leveraged the benefits of DevOps practices to improve their production processes and reduce errors. Several DevOps tools and technologies have enabled the automation of various workflows enhancing resource maximization and investment utilization. Also, with 360-degree infrastructure automation way ahead, the manufacturing sector can simplify processes even though there is a gamut of complex hardware, software, and firmware systems. With routine testing and regular bug fixing DevOps engineers are ensuring to take the productivity levels of the manufacturing industry to the next level. Manufacturers can build scalable and robust environments that can produce quality products faster. In the future, DevOps is sure to provide faster mean time to recovery (MTTR), reducing downtime and providing faster response to repair and recoveries.

Top Future Trends of DevOps That Will Influence Industries

Trends Description
Automation and Artificial Intelligence Problem identification and offering quick and effective solutions.
Enhanced Collaboration Promotes in-depth knowledge of team tasks and responsibilities
Security Automation Provides a fully automated system to teams for maintaining app security
Implementation of DevOps across all industries All types and sizes of industries will soon adopt DevOps technologies
CI/CD Organizations will deliver software constantly, rapidly, and with reliability through automation
Cloud-native architecture Cloud, DevOps, and software principles will combine to build innovative products and features.
Microservices Architecture Complex applications will be broken down into small services, making tasks easier and deployable
Kubernetes and container orchestration Effective management of containerized apps will be allocated across various deployment platforms

Conclusion

DevOps has been thriving for a while and its future looks promising for all kinds of industries. DevOps is continuously implementing several tools that foster quick delivery, automation, and easy collaboration for businesses. Its capacity to evolve and transform as per the changing trends ensures its acceptability and implementation by small and large companies in the future. The Future of DevOps is full of possibilities for organizations. The real challenge lies in its implementation strategy to get a favorable outcome. If you are looking for some robust solutions for your business workflows and want to reduce time-to-market for your product delivery and deployment, choose the right partner for your DevOps journey. Softqube Technologies has the best DevOps engineers who have proven their skills and expertise by transforming several businesses into profitable hubs.

FAQs

FAQs

How can DevOps help my business?

Businesses will be more agile and efficient in their operations through the implementation of DevOps automation. The development and operations department will closely collaborate ensuring continuous delivery and software maintenance with quick response to issues.

How can I implement DevOps?

To implement a DevOps strategy into your business, you must follow the below steps: Find a cloud service provider, design architecture, create a CI/CD pipeline, use IAC for automation of various areas, ensure security and compliance, and lastly implement support, maintenance, and incident response.

What is the next big transformation through DevOps?

The future of DevOps will be more about teams working together to build better products efficiently. It will be less about developers and operations teams and there will be just one team working with two roles. Hence, developers will have to play a larger role in introducing and practicing new technologies and innovations in their development processes.

How far will DevOps exist?

DevOps has been around for a long time. It will be here for many years to come since it has become very popular among organizations. Because, the DevOps approach is all about transforming organizations significantly in terms of product delivery and maintaining high quality, everything at speed and with agility.
Top 8 Skills Required in DevOps Engineer for 2024

Building a successful career in DevOps is the most coveted dream for any developer nowadays. Most developers today want to get away with the stereotypical role of software developer and pick something thrilling and challenging. However, before diving in for a DevOps engineer role, you must thoroughly understand what it takes to become an efficient and remarkable performer. Don’t get fascinated by just fanciful terminologies and their roles. You need to get to the roots and in-depth knowledge of the practicalities involved in different situations.

For that, you must have the right set of skills that can show you are a promising DevOps engineer who can be relied upon and can conduct expeditious software delivery, reducing time-to-market and guaranteeing end-user satisfaction. In the blog, we take you through the entire range of skills that every small and large company like Amazon and Netflix seeks in a DevOps Engineer role. Before that, let us glance at what is DevOps and who are DevOps Engineers.

What is DevOps?

What is DevOps

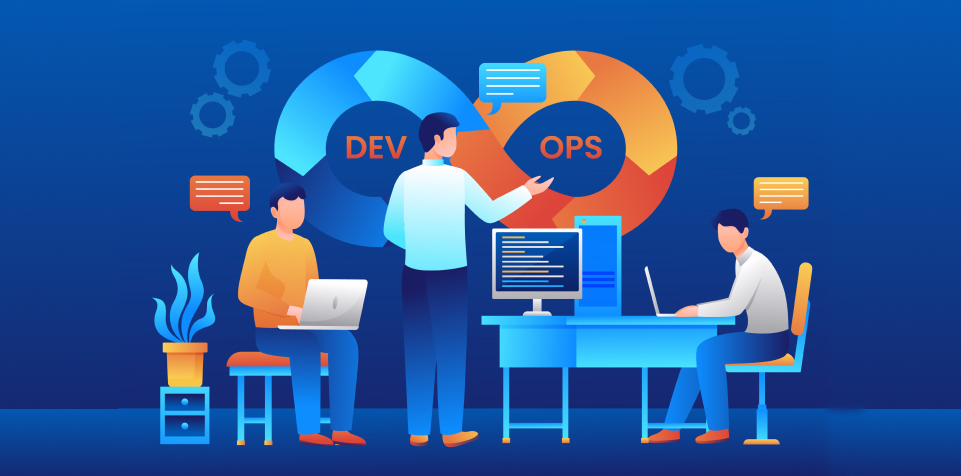
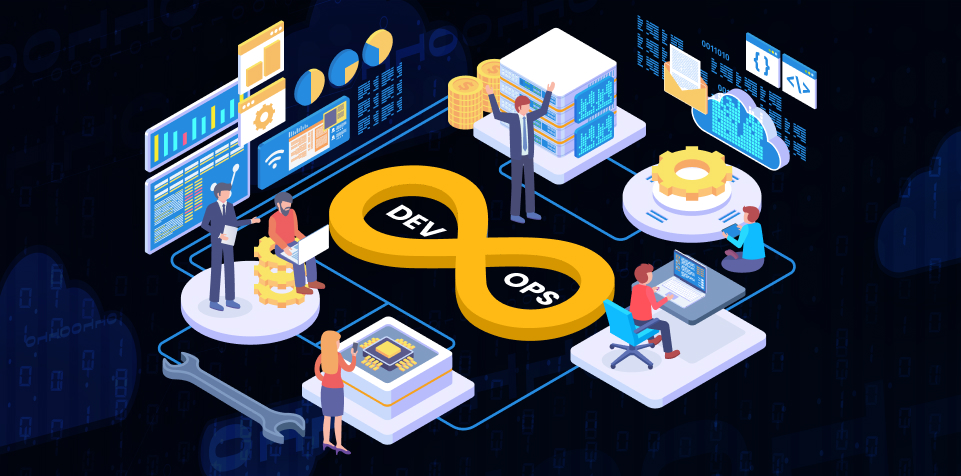
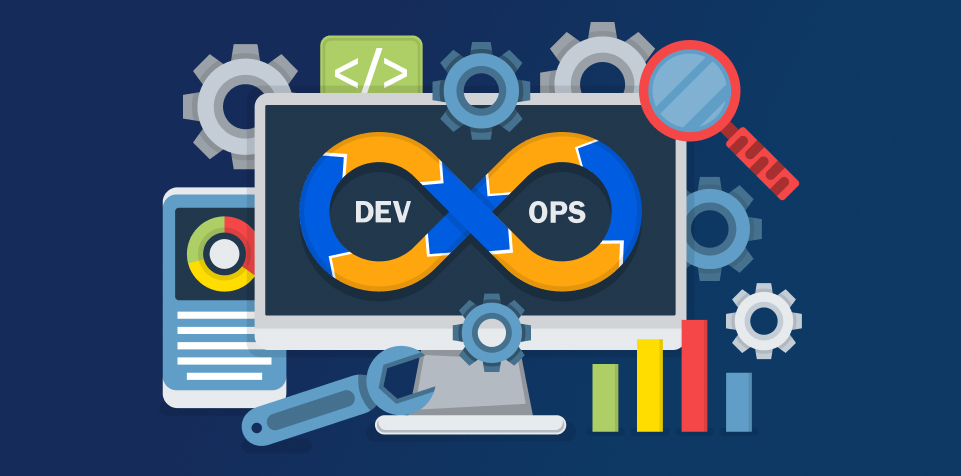
DevOps is a work culture driven by a methodology, aiming to automate and integrate software development and IT operations by implementing best practices and tools. It is a combination of two concepts ‘development’ and ‘operations’, unfolding various unconventional software development techniques to enhance quick delivery of services and applications. With DevOps, the team can evolve and innovate, identify and fix bugs rapidly, and promote reliability and scalability through effective collaborations.

Who is a DevOps Engineer?

Who is a DevOps Engineer

DevOps Engineer is a certified professional who masters the skill of integration of development and operations, streamlining the development process without compromising on quality standards. DevOps Engineers can easily adapt to both kinds of environments and are highly efficient in harnessing various DevOps tools and practices to accelerate the speed of the software development process.

It takes the below set of skills to work as a successful DevOps Engineer in 2024.

Top 8 Skills Required in a DevOps Engineer in 2024

An efficient DevOps Engineer manages application development and delivery processes with precision and safety. They control, coordinate, and monitor software changes. All this is possible only when they master the below set of skills.

Technical Skills

The most important skills that any DevOps Engineer will need in 2024 are knowledge and practice of core technical skills. They need a sharp understanding of:

Automation Skills

Understanding the process of automation is the fundamental knowledge any DevOps Engineer should have. They need to master this skill effectively and must be able to automate every step of the pipeline. It includes infrastructure, configuration, CI/CD cycles, and monitoring of the app performance. Moreover, they must know DevOps tools, scripting, and coding because all these elements are deeply related to automation skills.

Linux Coding and Scripting Skills

DevOps Engineers must have in-depth knowledge of Linux to manage and set up servers. Also, they must know coding and scripting for task automation.

Cloud Skills

Cloud and DevOps will always go hand in hand as they are directly influenced by each other. Cloud provides suitable infrastructure for testing, deployment, and code release. On the other hand, DevOps will drive the entire process. Cloud handles resource monitoring and offers the best CI/CD toolkit for DevOps automation. Hence, DevOps engineer needs robust cloud computing skills like database and network administration. They must be able to leverage various cloud platforms like Microsoft Azure, Google Cloud Platform (GCP), and Amazon Web Services (AWS).

Testing Skills

The real skill of a DevOps Engineer is seen in his or her testing abilities. Any DevOps automation pipeline needs flawless testing that must be automated continuously with perfection. Over the years, there have been many automated testing cases that have explored various procedures, ensuring high-quality delivery to users. DevOps Engineers must be well-acquainted with various testing technologies like Chef, Puppet, and Docker that contain visualization. Moreover, they must know how to combine Jenkins with Selenium for running tests through the entire DevOps automation pipeline.

Security Skills

The success rate of app deployment depends directly on the speed during the cycle in correlation with the rate of risks involved. DevOps Engineers must know when to consider integrating security measures and must consider them as a part of the ongoing development process. In this regard, DevSecOps has been ahead of the competition in integrating security with the SLDC from the outset. Hence, a DevOps engineer must have expertise in DevSecOps that involves code analysis, threat investigation, change management, vulnerability assessment, and security training.

Technical Support and Maintenance

This is an inevitable skill that every DevOps engineer must have. They must be capable of providing good technical support and maintenance that includes troubleshooting and fixing problems during the entire development process and post-deployment.

Coding and Scripting

This skill goes without saying that every DevOps engineer must have developer skills at the forefront. They must be efficient and expert in scripting and coding. They must have command over languages like Python, Java, Ruby, Node.js, Javascript, PHP, Shell, Bash, etc. in addition to having DevOps engineering skills. With every set of skills that they get, they also get the freedom to function according to their flexibility and convenience. Hence, during such situations, they must know how to leverage the benefits of Linux as it will be helpful in many situations in their career.

Sharp Knowledge of DevOps Tools and Technologies

There are various sets of tools and technologies that DevOps Engineers must know to operate. These tools are used during several phases of development and implementation. There are a variety of DevOps tools that include configuration management, version control, continuous integration servers, IAC, ALC, and much more.

Application Development Life Cycle

DevOps lifecycle contains a series of automated development workflows within the main development cycle. Hence, DevOps engineer knows how to practice collaborative and iterative approaches throughout the application development lifecycle that contains so many tools and technology stacks at various stages. The stages involved here are planning, code development, building codes, release codes on the production environment, deployment, operating the system by using tools, and monitoring the DevOps pipeline based on collected data from customer behavior and application performance.

Infrastructure As Code

The knowledge of infrastructure as code (IAC) is a crucial skill any DevOps Engineer must possess. The efficient practice of IAC leads to the successful implementation of CI/CD processes and DevOps. As a DevOps engineer, you must have IAC knowledge that involves version-controlling configurations, automating infrastructure provisioning, and ensuring consistency. Engineers must be able to change, configure, and automate infrastructure, thereby providing efficiency, visibility, and flexibility in infrastructure management.

Configuration Management

They must use these tools for the configuration management of any application. The role of DevOps engineers here is to ensure the correct version of the software is deployed with consistent configurations across various environmental platforms.

Continuous Integration/Delivery

It is the most crucial phase of the entire DevOps lifecycle journey. DevOps Engineers must ensure updated code or add-on functionalities are developed and integrated into existing code. They must be able to detect bugs, identify their codes, and modify the source code accordingly. This is the main step that keeps the integration going continuously wherein every code gets tested.

Various tools used to perform CI/CD are Jenkins, GitLab, TeamCity, Bamboo, Travis, and CircleCI.

Source Code Management

Also, there are tools like source code management used for managing the source code of any application. With these tools, you can ensure that every code is stored in a central repository and changes its track as per the given situation.

Continuous Testing

DevOps engineers must know how to use continuous testing tools to automate test code changes, ensuring to fulfill all the requirements without any errors. During this stage, they must continuously test for bugs and issues using Docker containers. They can also use tools like Selenium to enhance test evaluation reports and minimize provisioning and maintenance costs. Other tools that can be used in this phase are TestNG, JUnit, and TestSigma.

Containerization

As a DevOps engineer, you must also master the containerization technique utilized for packaging an application. This process enhances the speed and ease of deployment process and engineers must learn to leverage this skill. Container images are lightweight units to enhance the speed of apps to run faster. Docker and Kubernetes are the top providers of container technology.

Continuous Monitoring

Continuous monitoring tools can automate monitoring systems and applications to trace problems at an early stage and prevent them from becoming major challenges. DevOps engineers must be able to detect security issues and resolve them automatically in this phase. Various tools that they must know to use are Kibana, Nagios, Splunk, ELK Stack, Sensu,etc. during the continuous monitoring process.

Communication Skills

Apart from the entire set of technical skills that are needed to become a successful DevOps engineer, practicing flawless communication and collaboration skills is also crucial. They must be proficient in communicating the right message to developers, security experts, members of the operation team, and testers. With this skill, they can make the team work with cooperation and trust. Moreover, to match with company objectives, for dissolving team silos, and for establishing a healthy DevOps work culture, every engineer must work on their communication skills.

Predictive Monitoring

Being proactive and taking advanced steps to prevent forthcoming problems is a sign of a proficient DevOps engineer. As a responsible engineer, you can simply monitor systems to trace the signs of trouble and by using predictive analysis they can identify potential threats and issues. Overall, this skill will help them to avoid outages and disruptions, enhancing the entire quality of service. By practicing this skill, a DevOps engineer reflects the importance of working with passion and proactivity.

Configuration and Version Management

Another key responsibility that a DevOps engineer must have is to ensure all the code changes are tracked and seamlessly rolled back in the event of a problem. To perform this activity, they must have version management and strong configuration skills. With configuration management, they can manage environment variables and configuration files, helping developers to work with similar sets of configurations, and avoiding inconsistencies. And with version management, they can keep track of various versions of code and configurations.

Customer-Focused Approach

If you are seeking to have a successful career in DevOps then as an engineer you must keep a deep focus on your customers and their needs. To get this, know what your customer wants and understand their core needs. Also, as a DevOps engineer, you must learn to handle pressure and get through difficult times. A quick decision-making attitude that is focused on customer needs is the best way to achieve recognition and success in this profession.

Mastering Various Soft Skills

A DevOps Engineer works with a team of expert developers, testers, designers, managers, etc. It is difficult to drive the entire team towards a common goal. Hence there are several skills that they must learn to excel such as conflict management, problem solving, positivity, decision-making ability, leadership, interpersonal skills, organizational skills, communication, and behavioral skills.

Agile Methodologies

Practicing agile methodologies is one of the core skills needed in a DevOps Engineer. Most often the team works on Agile principles for seamless development cycles, making rapid iterations, and responding to the changing needs. DevOps engineers must know the best agile methodologies like Kanban, Scrum, or Lean, to align workflows with various operational strategies and development processes. They must embrace flexibility and adaptability to accommodate iterations in the project. They must actively participate in Agile ceremonies like sprint planning and retrospectives.

Tips to Develop DevOps Engineer Skills

Tips to Develop DevOps Engineer Skills

  • Practice your skills by working on real-life projects. Take guidance from online resources to crack coding problems. Develop a repository and start working on it.
  • Make sure you attend various industry events and workshops on DevOps. These events are sometimes free of cost and serve as an excellent opportunity to learn from the expert talks
  • Enroll for a course that gives you DevOps online training and teaches you about the basics of coding, containerization, and orchestration.
  • Get a degree in project management from a reputed institute. Go for a formal training.
  • Join an active DevOps community to learn the latest trends and technologies.
  • Get a real-world experience to achieve a deep understanding of the software development life cycle.

Need a DevOps Engineer to Create an Exceptional Software for Your Business?

Need a DevOps Engineer to Create an Exceptional Software for Your Business

If you are looking for a talented resource who is proficient and well-driven after honing all these skills and knowledge, hire a DevOps Engineer from Softqube Technologies for your next project. Our engineers are perfect in very many ways and have a unique set of abilities and qualities including hardware and network knowledge. They are competent in automation, have an understanding of development and operations, can use all types of DevOps tools and technologies, and have also mastered various soft skills. Talk to our experts today!

Mastering the Art of Code Deployment: Best Practices & Essential Tools with Softqube

Best Practices:

Incorporating a structured approach towards code deployment is not merely a trend, but a necessity. Following best practices ensures that the software delivery process is smooth, efficient, and less error-prone. The best practices involve maintaining a consistent codebase, frequently integrating the code, performing thorough automated tests, and ensuring seamless collaboration among developers, testers, and operations teams. Regular code quality checks using tools like SonarQube can highlight vulnerabilities before they become a significant issue, while containerization using Docker ensures that the application behaves consistently across various environments. Continuous monitoring post-release ensures that any issues are detected and resolved promptly.

Importance:

The landscape of software development is evolving rapidly, with user expectations on the rise and tolerance for bugs diminishing. Hence, shipping high-quality code at a swift pace becomes crucial. Following best practices ensures not only the speed of deployment but also the quality of code that is deployed. By integrating, testing, and deploying continuously, teams can detect and rectify errors faster, reducing the overall software development life cycle’s time and cost. Moreover, these practices foster collaboration, leading to more innovative solutions, improving team morale, and ensuring the delivered product’s resilience and scalability.

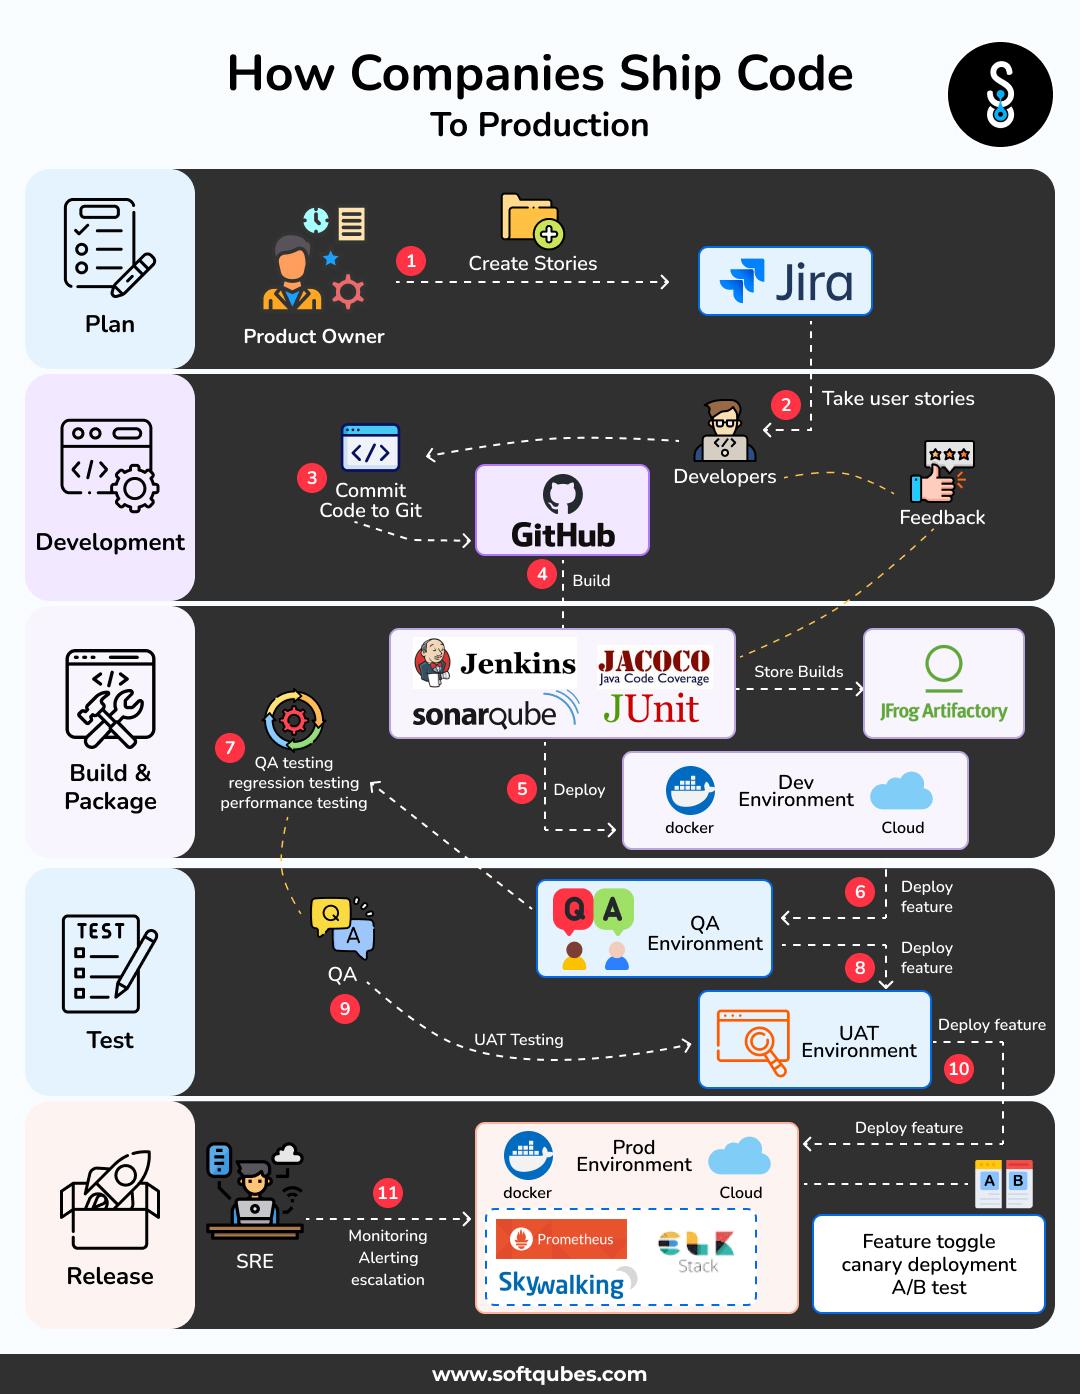
How to companies ship code

1. Plan:

Explanation:

Before any coding begins, the team sets out to identify the requirements, scope, and objective of the software or feature they intend to implement. This is the phase where project managers, developers, and stakeholders align on expectations.

Tools:

  • JIRA or Trello: For task tracking, setting priorities, and defining user stories.
  • Confluence: For documentation, where the specifics of the feature or requirements are outlined.
  • Slack or Microsoft Teams: For communication between team members and stakeholders.

2. Development:

Explanation:

Once the planning phase is complete, developers start writing the code. They’ll work in their local environments,frequently committing and pushing their changes to a version control system.

Tools:

  • Git (with GitHub, GitLab, or Bitbucket): For version control, allowing developers to track changes, collaborate, and manage code.
  • Visual Studio Code or IntelliJ: Popular Integrated Development Environments (IDEs) where the actual coding happens.
  • Docker: To ensure that the app runs the same way in every environment by using containers.

3. Build & Package:

Explanation:

After code has been developed, it’s compiled (for languages that aren’t interpreted) and bundled together with any necessary assets, ensuring that it’s ready for deployment. Additionally, this stage often incorporates code quality checks, unit testing, and code coverage evaluations before the application or feature is packaged and stored in a repository.

Tools:

  • SonarQube: This tool analyzes the codebase for quality, checking for code smells, bugs, and vulnerabilities. It ensures the code adheres to the team’s quality standards.
  • JUnit: A unit testing framework that helps developers ensure the logic of individual units of source code works as expected.
  • JACOCO: A code coverage library which ensures that a sufficient amount of the codebase is covered by unit tests.
  • Jenkins or CircleCI: Continuous Integration tools that automate the build, test, and packaging processes.
  • Webpack or Rollup: For frontend JavaScript applications, these tools help bundle and optimize the code.
  • JFrog (Artifactory): A universal artifact repository manager where the build artifacts (like JARs, WARs) are stored post-build.
  • Docker: Used for creating containerized versions of the application, ensuring consistency across all deployment environments.
  • Cloud (e.g., AWS, Azure, GCP): To deploy and host the application or service.

4. Test:

Explanation:

Before the code is released to production, it undergoes rigorous testing. This includes automated tests (like unit tests, integration tests) and manual tests to ensure the software behaves as expected.

Tools:

  • Junit or Mocha: For unit testing.
  • Selenium or Cypress: For end-to-end and integration testing of web applications.
  • Postman: For testing APIs.
  • Jenkins or CircleCI: Can also be used to automate the running of tests.

5. Release:

Explanation:

Once testing is complete, and the code is vetted as production-ready, it’s released to the production environment. During this phase, there may be final reviews, documentation updates, and communications with stakeholders. Post-release, it’s essential to monitor the application to ensure its smooth running.

Tools:

  • Prometheus: A monitoring and alerting toolkit. After the release, Prometheus can be used to keep an eye on the application, collecting metrics and offering insights into its performance and health
  • Ansible or Terraform: For infrastructure as code and automated deployment.
  • Jenkins or GitLab CI/CD: These tools can be utilized for Continuous Deployment, streamlining the process of getting the code from the repository to the production server.
  • Docker Swarm or Kubernetes: These are orchestrators for managing containers in production environments, ensuring they’re distributed, scaled, and maintained properly.
  • Slack or Microsoft Teams: Vital for team communication, especially during the release phase, to keep all stakeholders in the loop.

Integrating these tools into each stage makes for a robust CI/CD pipeline, ensuring code quality, rapid releases, and efficient monitoring.

Summary:

In the rapidly advancing world of software development, the journey from code conception to production deployment is a meticulous orchestra of steps and tools. This blog delineates the crucial phases from planning to release, emphasizing the significance of best practices like continuous integration, consistent code checks, and post-release monitoring. By integrating state-of-the-art tools such as SonarQube, Docker, Prometheus, and many others, one can streamline the software delivery process, ensuring swift, efficient, and high-quality results.

In this digital age, where software solutions drive businesses, it’s indispensable to stay ahead with optimized code practices. Softqube understands the intricacies of the software delivery process and is adept at guiding teams and businesses towards smarter coding practices. If you’re keen on elevating your coding standards and accelerating your software delivery, reach out to Softqube for consultation. Let’s make your code practices not just better, but smarter.

Kubernetes vs. the World: Container Orchestration Faceoff

What is Kubernetes?

Kubernetes is an open-source container orchestration platform that automates the deployment, scaling, and management of containerized applications. It was originally developed by Google and is now maintained by the Cloud Native Computing Foundation (CNCF). Kubernetes provides a platform-agnostic solution to manage containerized workloads and services.

Why Use Kubernetes?

Kubernetes offers several key benefits for containerized application management:

1. Automated Orchestration: Kubernetes automates the deployment and scaling of applications, making it easier to manage and maintain containerized workloads.

2. High Availability: Kubernetes ensures high availability by automatically distributing workloads across multiple nodes and rescheduling containers if a node fails.

3. Horizontal Scaling: Kubernetes can dynamically scale applications based on load, ensuring optimal resource utilization.

4. Self-Healing: Kubernetes automatically restarts failed containers and replaces them to maintain the desired state.

5. Declarative Configuration: Define the desired state of your application using YAML manifests, and Kubernetes will handle the actual state.

Use Cases of Kubernetes

Kubernetes is versatile and suitable for various use cases, including:

1. Application Deployment and Management

Kubernetes simplifies deploying and managing applications, enabling teams to focus on building features rather than dealing with infrastructure complexities.

2. Microservices Architecture

Kubernetes supports microservices-based applications, allowing independent deployment, scaling, and versioning of different microservices.

3. Continuous Deployment

Kubernetes integrates with continuous integration and continuous deployment (CI/CD) tools, streamlining the process of delivering updates to applications.

4. Hybrid and Multi-Cloud Environments

bernetes provides a consistent platform to run applications across different cloud providers and on-premises environments.

How Kubernetes Works

Kubernetes uses a master-worker node architecture:

How Kubernetes Works

Master Node

The master node controls the Kubernetes cluster and makes global decisions about the cluster’s state. Key components on the master node include:

  • API Server: Exposes the Kubernetes API and acts as the front-end for the control plane.
  • Controller Manager: Runs various controllers that handle routine tasks such as node and endpoint monitoring.
  • Scheduler: Assigns pods to nodes based on resource requirements and other constraints.
  • etcd: A distributed key-value store that stores the cluster’s configuration data.

Worker Nodes

Worker nodes (also called minion nodes) are where containers are scheduled and run. Each worker node communicates with the master node. Key components on worker nodes include:

  • Kubelet: Communicates with the API server and manages containers on the node.
  • Container Runtime: The software responsible for running containers, such as Docker or containerd.
  • kube-proxy: Manages network connectivity between services within the cluster.

Kubernetes Cluster Diagram

Here’s a simplified diagram of a Kubernetes cluster:

Kubernetes Cluster Diagram

Kubernetes Fundamental Concepts

1. Pods

Pods are the smallest deployable units in Kubernetes, representing one or more containers that share storage and network resources. Pods are often co-located on the same node and communicate with each other via localhost.

2. ReplicaSets

ReplicaSets ensure that a specified number of identical pods are running at all times, even in the face of failures. They are used to maintain the desired number of replicas for a specific pod template.

3. Deployments

Deployments provide declarative updates to ReplicaSets, managing the process of creating and updating pods. They are the recommended way to manage the lifecycle of pods.

4. Services

Services enable network access to pods, allowing them to communicate with each other and external clients. Services abstract the underlying pod IP addresses and provide a stable endpoint.

5. ConfigMaps and Secrets

ConfigMaps and Secrets store configuration data and sensitive information, respectively, which can be injected into containers. They allow for decoupling configuration from the container image.

Kubernetes Deployment

Deploying Node.js Project on Minikube Cluster

This documentation outlines the steps to deploy MongoDB and Mongo Express on Kubernetes using the provided YAML configuration files.

Prerequisites

Before deploying the project, make sure you have the following prerequisites:

1. Kubernetes cluster is set up and running.

2. kubectl is installed and configured to access the Kubernetes cluster.

Step 1: Set Up Kubernetes Cluster

To set up the Kubernetes cluster, follow the steps below:

1. Install a Container Runtime (e.g., Docker)

Ensure that you have a container runtime installed on your system. Docker is a commonly used container runtime.

2. Install a Kubernetes Management Tool (e.g., Minikube, k3s, kubeadm)

Choose a Kubernetes management tool suitable for your environment and follow the installation instructions.

Example: Installing Minikube (For Local Development)

For local development, you can use Minikube. Install Minikube using the following command:

# Install Minikube (Linux)
curl -LO https://storage.googleapis.com/minikube/releases/latest/minikube-linuxamd64 \
&& sudo install minikube-linux-amd64 /usr/local/bin/minikube
# Install Minikube (macOS)
brew install minikube

3. Start the Kubernetes Cluster (Minikube)

After installing Minikube, start the Kubernetes cluster using the following command:

minikube start

Step 2: Install and Configure kubectl

To install and configure kubectl, follow the steps below:

1. Install kubectl

Install kubectl using your package manager or download the binary from the official Kubernetes release:

# Install `kubectl` (Linux)
sudo apt-get update && sudo apt-get install -y kubectl
# Install `kubectl` (macOS)
brew install kubectl

2. Configure kubectl to Access the Kubernetes Cluster

Configure kubectl to access the Kubernetes cluster created in Step 1 (e.g., Minikube):

# Set `kubectl` context to Minikube
kubectl config use-context minikube

Step 3: Deploy MongoDB

1. Create the Secret for MongoDB Root Credentials

# (Content of mongo-secret.yaml)
      apiVersion: v1
      kind: Secret
      metadata:
        name: mongodb-secret
      type: Opaque
      data:
        mongo-root-username: dXNlcm5hbWU=
        mongo-root-password: cGFzc3dvcmQ=
          

Apply the MongoDB Secret using the following command:

kubectl apply -f mongo-secret.yaml

2. Deploy MongoDB Deployment and Service

# (Content of mongo.yaml)
      apiVersion: apps/v1
      kind: Deployment
      metadata:
        name: mongodb-deployment
        labels:
          app: mongodb
      spec:
        replicas: 1
        selector:
          matchLabels:
            app: mongodb
        template:
          metadata:
            labels:
              app: mongodb
          spec:
            containers:
            - name: mongodb
              image: mongo
              ports:
              - containerPort: 27017
              env:
              - name: MONGO_INITDB_ROOT_USERNAME
                valueFrom:
                  secretKeyRef:
                    name: mongodb-secret
                    key: mongo-root-username
              - name: MONGO_INITDB_ROOT_PASSWORD
                valueFrom:
                  secretKeyRef:
                    name: mongodb-secret
                    key: mongo-root-password
      ---
      apiVersion: v1
      kind: Service
      metadata:
        name: mongodb-service
      spec:
        selector:
          app: mongodb
        ports:
        - protocol: TCP
          port: 27017
          targetPort: 27017
          

Apply the MongoDB Deployment and Service using the following command:

kubectl apply -f mongo.yaml

Step 4: Deploy Mongo Express

1. Deploy Mongo Express Deployment and Service

# (Content of mongo-express.yaml)
        apiVersion: apps/v1
        kind: Deployment
        metadata:
          name: mongo-express
          labels:
            app: mongo-express
        spec:
          replicas: 1
          selector:
            matchLabels:
              app: mongo-express
          template:
            metadata:
              labels:
                app: mongo-express
            spec:
              containers:
              - name: mongo-express
                image: mongo-express
                ports:
                - containerPort: 8081
                env:
                - name: ME_CONFIG_MONGODB_ADMINUSERNAME
                  valueFrom:
                    secretKeyRef:
                      name: mongodb-secret
                      key: mongo-root-username
                - name: ME_CONFIG_MONGODB_ADMINPASSWORD
                  valueFrom:
                    secretKeyRef:
                      name: mongodb-secret
                      key: mongo-root-password
                - name: ME_CONFIG_MONGODB_SERVER
                  valueFrom:
                    configMapKeyRef:
                      name: mongodb-configmap
                      key: database_url
        ---
        apiVersion: v1
        kind: Service
        metadata:
          name: mongo-express-service
        spec:
          selector:
            app: mongo-express
          type: LoadBalancer
          ports:
          - protocol: TCP
            port: 8081
            targetPort: 8081
            nodePort: 30000
            

Apply the Mongo Express Deployment and Service using the following command:

kubectl apply -f mongo-express.yaml

Step 5: Configure the Database URL ConfigMap

# (Content of mongo-config.yaml)
        apiVersion: v1
        kind: ConfigMap
        metadata:
          name: mongodb-configmap
        data:
          database_url: mongodb-service
            

Apply the Database URL ConfigMap using the following command:

kubectl apply -f mongo-config.yaml

Cleanup

To clean up the deployed services, use the following commands:

kubectl delete -f mongo-express.yaml
kubectl delete -f mongo.yaml
kubectl delete -f mongo-secret.yaml
kubectl delete -f mongo-config.yaml

Conclusion

Kubernetes is a powerful container orchestration platform that simplifies the management of containerized applications. It provides scalability, high availability, and automation, making it a popular choice for modern cloud-native applications.

For more detailed information, refer to the official Kubernetes documentation: https://kubernetes.io/docs/

Apache Kafka: A Comprehensive Guide to Real-time Data Streaming and Processing

Introduction to Apache Kafka

Apache Kafka is an open-source distributed event streaming platform, originally developed by LinkedIn and later donated to the Apache Software Foundation. It is designed to handle large-scale, real-time data streams and provides a publish-subscribe messaging system that is highly reliable, scalable, and fault-tolerant.

At its core, Kafka allows you to publish and subscribe to streams of records, which can be messages, events, or any kind of data. It is particularly well-suited for scenarios where large amounts of data need to be ingested and processed in real-time, such as log aggregation, monitoring, data warehousing, recommendation engines, fraud detection, and more.

Usage and Benefits of Kafka

Kafka Use Cases

  • 1. Real-time Data Streaming:

    Kafka allows the ingestion, processing, and delivery of real-time data streams, making it suitable for various data-driven applications.

  • 2. Log Aggregation:

    Kafka can collect and consolidate log data from various systems, making it easier to analyze and monitor system behavior.

  • 3. Metrics Collection:

    Kafka can be used to collect and aggregate metrics data from different sources, facilitating performance monitoring.

  • 4. Event Sourcing:

    Kafka’s event-driven architecture is well-suited for event sourcing patterns, where the state of an application is determined by a sequence of events.

  • 5. Stream Processing:

    Kafka integrates well with stream processing frameworks like Apache Flink, ApacheSpark, and Kafka Streams, enabling real-time data processing.

Benefits of Kafka

  • 1. Scalability:

    Kafka is designed to scale horizontally, allowing it to handle an increasing volume of data and traffic.

  • 2. Durability:

    Kafka stores messages on disk, providing fault tolerance and data durability.

  • 3. High Throughput:

    Kafka can handle high message throughput, making it suitable for use in dataintensive applications.

  • 4. Low Latency:

    With its real-time streaming capabilities, Kafka enables low-latency data processing.

  • 5. Reliability:

    Kafka is designed to be highly reliable and fault-tolerant, ensuring data delivery even in the face of failures.

Kafka Architecture and Fundamental Concepts

Kafka Architecture

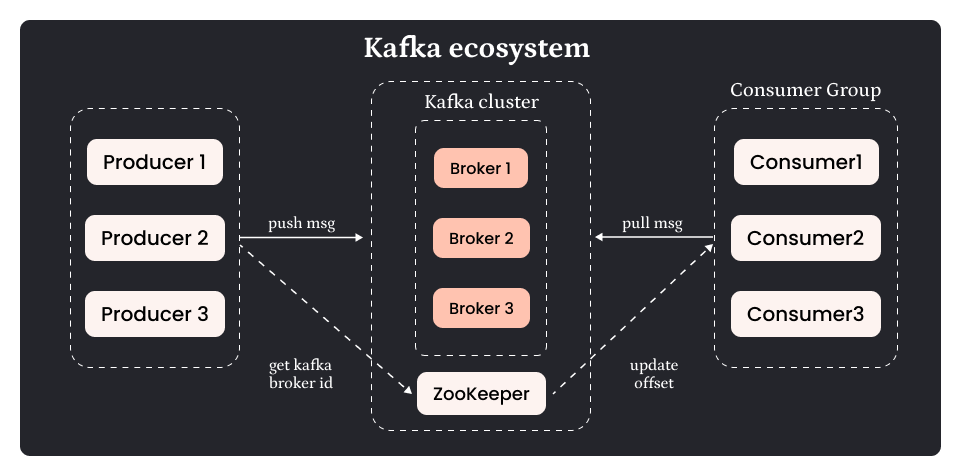
Kafka has a distributed architecture consisting of the following key components:

  • 1. Producer:

    A producer is a client that sends messages to Kafka topics.

  • 2. Broker:

    Brokers are the Kafka servers responsible for message storage and serving consumer requests.

  • 3. Topic:

    A topic is a category or feed name to which messages are published.

  • 4. Partition:

    Each topic is divided into partitions, allowing data to be distributed across multiple brokers.

  • 5. Consumer:

    A consumer is a client that reads messages from Kafka topics.

  • 5. Consumer Group:

    Consumers can be organized into consumer groups, allowing parallel consumption of messages.

Kafka Architecture

Fundamental Concepts

Publish-Subscribe Model

Kafka follows the publish-subscribe messaging model. Producers publish messages to a topic, and consumers subscribe to topics to receive messages.

Message Retention

Kafka retains messages for a configurable period. Once this period elapses, messages are deleted, allowing consumers to control the pace of consumption.

Replication

Kafka allows data replication across multiple brokers to ensure fault tolerance and data availability.

Partitions and Offsets

Each partition in Kafka is an ordered log of messages. Messages within a partition are assigned a unique offset.

Consumer Offset Tracking

Consumers can track their progress in consuming messages through offsets, enabling them to resume from the last processed message after restart.

Kafka Usage Scenarios

Implementing Kafka in a Real Project: Step-by-Step Guide

Step 1: Kafka Installation and Setup

1. Download Kafka

Start by downloading Apache Kafka from the official website (https://kafka.apache.org/downloads). Choose the appropriate version for your operating system.

Downloading Kafka on Windows

In this documentation, we’ll guide you through the process of downloading Apache Kafka on a Windows operating system.

Prerequisites

Before you proceed, ensure you have the following:

1. Java: Kafka requires Java to run. Make sure you have Java installed on your system. You can download the latest Java Development Kit (JDK) from the official Oracle website (https://www.oracle.com/java/technologies/javase-downloads.html).

Step 1: Download Kafka

1. Go to the Official Kafka Website: Open your web browser and navigate to the official Kafka website at https://kafka.apache.org/downloads.

2. Choose the Kafka Version: On the Kafka downloads page, you’ll see various versions available for download. Select the latest stable release version suitable for your operating system (Windows in this case).

3. Download the Binary: Under the “Binary downloads” section, click on the link to download theKafka binary. This will initiate the download process.

4. Extract the Archive: Once the download is complete, navigate to the location where the Kafka binary was downloaded (e.g., C:\Users\Downloads). Right-click on the downloaded file and choose “Extract All” to extract the contents.

Step 2: Configure Kafka

1. Set Up Environment Variables: To run Kafka, you need to set up some environment variables. Right-click on “This PC” (or “My Computer”) on your desktop and select “Properties.” Then, click on “Advanced system settings” on the left sidebar. In the System Properties window, click the “Environment Variables” button. Under “System variables,” click “New” to add a new variable.

2. Variable Name: Enter KAFKA_HOME as the variable name.

3. Variable Value: Enter the path to the extracted Kafka directory (e.g., C:\kafka_2.13-3.0.0) as the variable value.

4. Find Java Home: To find your Java Home directory, open a command prompt and type echo %JAVA_HOME%. Copy the path displayed (e.g., C:\Program Files\Java\jdk-17) for the next step.

5. Configure Java Home: In the same “Environment Variables” window, click “New” again to add another variable.

6. Variable Name: Enter JAVA_HOME as the variable name.

7. Variable Value: Paste the path to your Java Home directory that you obtained in the previous step (e.g., C:\Program Files\Java\jdk-17).

8. Update Path Variable: Locate the “Path” variable under “System variables” and click “Edit.” Add the following two entries (if not already present) to the variable value:

9. Save and Apply: Click “OK” to save the changes. Close the “Environment Variables” and “System Properties” windows.

Step 3: Verify Installation

1. Open Command Prompt: Press Windows + R, type cmd, and press Enter to open a command prompt.

2. Navigate to Kafka Directory: Change the directory to the Kafka installation folder by typing the following command and pressing Enter:

Replace C:\kafka_2.13-3.0.0 with the path to your extracted Kafka folder.

3. Start ZooKeeper: To verify that Kafka is working correctly, let’s start ZooKeeper. In the command prompt, run the following command:

If successful, ZooKeeper will start running.

4. Start Kafka Broker: In a new command prompt window (to keep ZooKeeper running), navigate to the Kafka installation folder again. Run the following command to start the Kafka broker:

If successful, Kafka will start running.

Congratulations! You have successfully downloaded and set up Apache Kafka on your Windowssystem.

You can now use Kafka to build salable and distributed Data streaming applications to handle realtime data streams.

Please note that the version numbers and paths mentioned in this documentation may vary based on the version of Kafka you downloaded and your specific setup.

2. Extract the Archive: Once downloaded, extract the Kafka archive to a directory on your machine.

3. Start ZooKeeper: Kafka depends on ZooKeeper for managing the cluster. Open a terminal (or command prompt) and navigate to the Kafka directory. Start ZooKeeper by running the following command:- zookeeper-server-start.bat ..\..\config\zookeeper.properties

4. Start Kafka Brokers: In separate terminal windows, start one or more Kafka brokers with the following commands:- kafka-server-start.bat ..\..\config\server.properties

5. Create Topics: Create the necessary topics that your application will use. For our scenario, we might create a topic named “website_traffic” to handle incoming data. Use the following command to create a topic:-

kafka-topics.bat –create –topic testing-topic –bootstrap-server localhost:9092 – -replication-factor 1 –partitions 3

Step 2: Producer Implementation

In this step, we’ll implement a data producer that captures website traffic data and sends it to the Kafka topic “website_traffic.”

1. Set Up a Producer: In your application code, you’ll need to include the Kafka client library for your programming language (e.g., Java, Python). Initialize a Kafka producer and configure it to connect to the Kafka brokers.

2. Collect Data: Write code to collect website traffic data, such as page views, clicks, or user interactions. You can use tools like Apache Kafka producers to simulate data or integrate with web servers or applications to capture real traffic data.

3. Publish Data: Once you have the data, format it as a Kafka message and publish it to the “website_traffic” topic using the Kafka producer.

-web_activity_producer.py
from confluent_kafka import Consumer, KafkaError
# Kafka broker address
bootstrap_servers = 'localhost:9092'
def consume_messages(topic):
consumer = Consumer({
'bootstrap.servers': bootstrap_servers,
'group.id': 'my_consumer_group',
'auto.offset.reset': 'earliest'
})

consumer.subscribe([topic])
while True:
msg = consumer.poll(1.0)
if msg is None:
continue
if msg.error():
if msg.error().code() == KafkaError._PARTITION_EOF:
print('Reached end of partition')
else:
print(f'Error while consuming: {msg.error()}')
else:
print(f'Received message: {msg.value().decode("utf-8")}')
if __name__ == '__main__':
topic_name = 'testing-topic'
consume_messages(topic_name)

RESULT OF CODE

RESULT OF CODE

Step 4: Real-time Analytics & Visualization

In this step, we’ll visualize the real-time analytics using a simple web-based dashboard. For this, we’ll use a WebSocket connection to update the dashboard in real-time as new data arrives.

1. Set Up a WebSocket Server: Implement a WebSocket server in your preferred programming language (e.g., Node.js, Python) to handle connections from the dashboard.

2. WebSocket Connection: Establish a WebSocket connection from the dashboard to the WebSocket server.

3. Receive and Display Data: As new data arrives from the Kafka consumer, send it via the WebSocket connection to the dashboard. Update the dashboard in real-time to display the latest analytics, such as the number of page views, active users, etc.

Step 5: Deploy and Monitor

1. Deployment: Deploy your Kafka cluster, producers, consumers, and dashboard to your production environment.

2. Monitoring: Implement monitoring for your Kafka cluster and application components to ensure the system’s health and performance. Use tools like Apache Kafka Monitor, Prometheus, Grafana, etc.

Step 6: Scaling

As the website traffic and data volume grow, you might need to scale your Kafka cluster and consumers horizontally to handle the increased load. This involves adding more Kafka brokers and consumers as needed.

Conclusion

Kafka’s ability to handle real-time data streams with high scalability, fault tolerance, and low latency makes it a powerful tool for a wide range of use cases. Its publish-subscribe model and distributed architecture make it suitable for various data-driven applications, making it a popular choice among kafka developers and organizations.

Softqube Technologies proudly presents “Apache Kafka: A Comprehensive Guide to Real-time Data Streaming and Processing,” a testament to our commitment to delivering cutting-edge solutions in the realm of data management. At Softqube, we understand the profound impact that real-time data processing holds in shaping the success of businesses today.

Scale Your Product Lifecycle From Complex to Effortless With Kubernetes Consulting Services

Created originally by Google for managing in-house application deployment, Kubernetes has now evolved into a one-stop, cloud-based, and open-source solution for scaling, automating deployment, and management of containerized applications, including machine learning and software models. It helps DevOps teams keep pace with software development needs, build cloud-native applications that run anywhere, and derive maximum utility from containers. With a whopping 96% of the organizations evaluating or using the technology, as per the CNCF (Cloud Native Computing Foundation)’s 2021 survey, Kubernetes went conventional in less than a decade.

Over 90% of organizations currently use containers in production. Without Kubernetes, some companies have teams focused exclusively on scripting deployment, updating workflows, and scaling for thousands of containers. This blog post will put light on how Kubernetes consulting services can help you elevate your application performance and refine your development lifecycle. It will also present the key benefits of businesses and will explain how Kubernetes consulting services resolve security challenges.

Kubernetes consulting services

Relieve your developers from redundant and manual tasks of container maintenance and testing and deploy a production-grade Kubernetes infrastructure. Kubernetes Consulting Services helps you innovate at speed and scale by orchestrating containerized workloads seamlessly for your DevOps practices and CI/CD pipelines, accelerating time to market and delivering enhanced developer productivity.

  • Kubernetes Consultation

    Assess the maturity and readiness of business processes for running Kubernetes clusters reliably. The experts compare current processes to best practices, norms, conventions, and industry standards. Prepare a systematic roadmap to efficiently manage your containers with Kubernetes services and deployments. Consulting providers help you build fully-functional Kubernetes operations, deploy robust security solutions, and monitor applications in complex environments to keep your apps safe during downtime. The engineers build a plan and audit existing products. They avail expert guidance through Kubernetes training and workshops and cover the audit, discovery, assessment, and reporting process. Also, they develop cloud-native practices with industry-standard system practices.

  • Kubernetes Distributions and Multi-cloud Orchestration

    Based on business and technical needs, get expert help in selecting and installing the optimal Kubernetes distribution. You can decide your Kubernetes distribution based on factors such as networking support, automated upgrades, edge deployment, on-premises or cloud architecture, and storage needs. By getting specialized Kubernetes distribution services, you can avoid vendor lock-in while using multiple storage providers and cloud services in a single network architecture. The team of experts helps you automate the container lifecycle, including load balancing, health monitoring, scaling, deployments, and provisioning to ensure secure application performance, boost resilience, and simplify operations.

  • Cloud Native Security Management

    Build a streamlined workflow to undertake proactive responses and monitoring, upgrades and patches, and complete container cluster maintenance. Help your team emphasis on providing state-of-the-art solutions and facilitating quick deployments in a flexible ecosystem. Service providers implement security best practices for four Cs of cloud-native security- Code, Container, Cluster, and Cloud/Co-lo/Data Center. With their own tools or third-party tools of Kubernetes, such as Aqua, Anchore, or other tools, they can enhance security management according to your requirements. Experts ensure automatic updates for the security best practices and securely administer cluster, scan, sign, and deploy packages. Cost-effective service providers such as GKE, Amazon EKS, or AKS are used for default security configurations.

  • Automated Delivery Pipelines

    The Kubernetes service providers ensure improved stability with Git’s ability to rollback/revert and fork, increased productivity with CI/CD automation, higher reliability with a single foundation of truth from which to recover after a meltdown as well as cryptography-backed security. The experts enable changes in the git repository to apply to your system automatically. They get alerts whenever there is any divergence between the code running in a cluster and the single declarative source of truth in the Git repository. With Kubernetes reconcilers, they can roll back or update clusters automatically.

  • Clustering

    The engineers build dynamic clusters and reusable abstractions to adapt and reuse strategies across departments and projects. They ensure scalability, cost optimization, and resiliency with Kubernetes. Also, they can run containers on multiple environments, operating systems, and machines, including hybrid, on-premises, cloud-based, physical, and virtual. Experts can orchestrate multiple clusters over geographical regions, seamlessly roll out updates, maintain a cluster’s state, and scale applications.

  • Observability and monitoring in Kubernetes

    Experts use the tools, system, and Kubernetes expertise to collect insightful metrics about tracing, monitoring, and logging. They can maintain a detailed log as well as audit trails regarding transactions across machines, nodes, and clusters. Also, they can visualize related data and monitor application performance with tools that best suites your personalized needs. The providers get business metrics that assign a value to the transactions logged, thereby going beyond just technical matters.

key benefits of kubernetes for businesses

Key Benefits of Kubernetes for Businesses

The growth in developers with Kubernetes involvement further underscores its market-leading status. Kubernetes also maintains a fast-growing, sizable ecosystem of complementary software tools and projects, making it easy to outspread functionality. But the key benefits of Kubernetes make it a de facto solution for container orchestration and management. Now let’s examine five key benefits of Kubernetes for your business.

  • Flexibility to quickly scale with business demand

    Utilizing the similar principles that enable Google to run billions of containers every week, Kubernetes helps organizations simplify resource management that otherwise would need intensive human effort and bloated staff.

    Autoscaling is one of the key benefits of Kubernetes, helping enterprises to respond instantly to rises in demand without the need to scale down manually or provision resources with the change in demand. Also, it prevents needless spending, automatically and efficiently managing workloads based on application thresholds and goals without performance issues, waste, or downtime.

    Organizations tend to overprovision without autoscaling and, therefore, to ensure availability, overpay. Otherwise, services may fail during peak demand as they do not have enough available resources to handle surges.

  • Probability of running anywhere

    You can use Kubernetes effortlessly wherever there is a need. While several orchestrators are tied to infrastructures or runtimes, Kubernetes was developed to support large-scale variable and complex infrastructure environments. It can not only work with virtually any programs that run your containers, but also, it is portable across infrastructure hosted through a private approach, in private or public clouds, and on-premises.

  • High availability through self-healing

    Business applications need resilience, maintaining reliable operation irrespective of disasters, updates, or technical glitches. Another key advantage is that it allows your infrastructure to self-heal. It offers continuous user-defined health checks and monitoring that ensures that your clusters always function optimally. If containers or pods turn corrupt, stop serving traffic or running, Kubernetes automatically works to recuperate the intended state.

    In case of container failure, Kubernetes will automatically detect and restart that. Unhealthy containerized apps are rebuilt inevitably to your desired configurations. In case of a node failure, Kubernetes avoids downtime by scheduling all its pods automatically to run on the healthy nodes in the cluster till the problem is solved.

    Also, this platform applies changes to an application and its configuration gradually checking application health simultaneously to ensure it does not eradicate your instances. Kubernetes rolls back the change spontaneously if something goes wrong.

  • Cost Optimization

    It’s free for anyone to use, and open source is the biggest cost savings opportunity delivered by Kubernetes. Ever since 2014, it was donated to CNCF by Google. The open-source community has assembled around it, with thousands of developers as well as companies like Intel, IBM, and Google adding improvements and innovations to the core platform

    However, businesses can originate other significant cost optimizations also by executing an automated, centralized, and single platform for container administration:

    Less burden on operations teams: The automated features such as self-healing, autoscaling, integrations, and logics with major cloud vendors minimize manual and time-consuming operations on your infrastructure. IT teams, with less support needed, are free to focus on tasks that are more value-added.

    Efficient resource management: As resource allocation is adjusted automatically to real-time application requirements, Kubernetes overcomes scalability and demand challenges, controls infrastructure costs, and maximizes efficiency.

  • Multi-cloud

    With Kubernetes, it is now easy to realize the promise of multi-cloud environments. As it indiscriminately runs in any environment, it can scale environments efficiently from one cloud provider to another and from on-premises to the cloud without performance or functional losses.

    This portability avoids vendor lock-in enabling you to align workloads with the cloud services that are best for your use case. 92% of organizations currently have a multi-cloud strategy underway or in place to manage costs, increase resiliency, or drive innovation.

    Overall, Kubernetes is the go-to solution of the market to manage modern container deployments in a cost-effective, flexible, and efficient way.

how do kubernetes consulting services resolve security challenges

How do Kubernetes consulting services resolve security challenges?

Containers are replacing virtual machines rapidly as the compute instance in cloud-based deployments. The power of Kubernetes is used for automating and managing container deployments. With many companies depending on containerization and cloud computing, IT companies tend to offer Kubernetes consulting services to help businesses to manage containers.

To work with clients to fulfill an array of Kubernetes needs concerning niche services and markets, the companies require the services of Kubernetes experts when they set their container journey. They will begin by learning the fundamentals.

Kubernetes is a method to master the art of containerization. Several companies are eager to embrace it by hiring the proficiency of consulting firms. This phenomenon is triggered by different factors, both externally and internally. The major ones are storage issues and security challenges while managing Kubernetes.

Below mentioned are the reasons why companies nowadays are after Kubernetes.

  • Most demanding technology

    In many respects, Kubernetes is the most demanding technology with great potential. Containerization is pretty complex, and many organizations have realized that embracing Kubernetes is a necessity. A Kubernetes consulting provider can guide users and help them understand the best practices of leveraging containers while helping them blend it with their efforts of DevOps. Also, they help companies to find out how to govern Kubernetes with their enterprise applications. While helping companies, consulting providers are keen on adapting to new developments in the platform to get out of the best practices.

  • Intricate to operate

    Kubernetes is quite a powerful technology, and container orchestration is used by many organizations worldwide. Operating a Kubernetes system, though it is useful, is quite an intricate affair. Organizations that incorporated Kubernetes can hardly manage new updates added to Kubernetes. Adding various extensions and spectacular features, Kubernetes is evolving rapidly. Even technology enthusiasts find it tough to adapt and assimilate. So, there is a need to seek the expertise of a Kubernetes provider. Indeed, the knowledge gap is bliss to consulting firms.

  • Aids in digital transformation

    By adopting various technologies, IT companies are after digital transformation. They wish to utilize the best out of Kubernetes. Thus, appointing a Kubernetes skillset is the best option for them. Companies and their in-house teams wish to achieve digital transformation in every aspect. In order to attain this objective, it is important to understand what type of container technology can suit your specific requirements and products. Several containerization products are available in the market, like Docker Swarm, Mesos, or Openshift. It’s risky to find the most suited one.

Kubernetes consulting can solve the security fears of companies.

kubernetes consulting can solve the security fears of companies

It is impossible for a technology to provide 100% or fail-proof technology. However, when you embrace Kubernetes into your company, you can be at more ease. The security provided by Kubernetes is tremendous. Normally, companies that try to automate and deploy their container management face a few catastrophes and technical lags. If ignored, they can be the greatest threat to the overall system. Typical challenges come with respect to storage features and security.

Thanks to the brand-new arriver of the Container Storage Interface, the latest beta implementation, the storage features of Kubernetes are very complex. The security of Kubernetes is quite challenging for companies who consider the stateless nature of the platform. Lately, Kubernetes has been evolving at a rapid rate. So, up-to-date knowledge is a necessity to have top-notch security in your system. When companies fail to secure their Kubernetes system, the running applications and access privileges are vulnerable to malfunction. The security threats can vary from one company to another as companies have different inclinations and goals.

Wrapping up

With Softqube Technologies you can now develop a robust plan of action with our efficient Kubernetes consulting services and can explore the full potential of containerization with a careful assessment of opportunities and risks in your business. By collaborating with us, we offer Kubernetes management and implementation enabling IT leaders to access a deep well of experienced and exceptionally skilled DevOps talent cost-effectively. In order to get the best of both worlds, we combine multi-cloud capability, resilience, and scalability with continuous delivery/deployment. You can now create an innovation-rich development environment for your organization. Choose Softqube as your ideal DevOps partner and get peace of mind that your apps are production-ready at scale using Kubernetes to accelerate release timelines and operate smarter.

DevOps Series – VII – Configuration Management with Ansible

What is Configuration Management?

Configuration Management (CM) establishes and maintains consistency of the product’s characteristics, performance, and functionality, with its design, requirements, and operational data, across the product lifecycle. CM is an IT management system that falls under the category of systems engineering processes.

CM monitors individual assets of an IT system (IT assets may vary from software, or server to a cluster of servers) and identifies whether there is a need to patch, update, or reconfigure the system for maintaining the desired state.

How to implement Configuration Management?

CM implementation is a 4-step process that involves:

  • The first stage involves information gathering and compiling to further establish configuration. Point of identification includes test cases, code modules, specification requirements, as well as necessary resources, tools, files, documents, and other aspects required for a successful product cycle.
  • The second stage involves establishing the baseline configuration. Baseline configuration enables successful operation of the dependent IT assets, without causing any error.
  • Version control ensures the integrity of the product by identifying accepted versions of IT assets. It also controls changes to be levied on the product cycle.
  • Auditing is crucial to product cycles. The audit team makes sure that the project is successful and competent as per the roadmap of a product cycle.

The Advantages of Configuration Management

  • Well-established configuration and control enhance visibility and enable tracking across the product life cycle. The outcome is better efficiency.
  • CM begins with information gathering. As information regarding all the IT elements is gathered and compiled, there is no scope for unnecessary duplication.
  • Profound agility enables quick problem solutions and faster releases.
  • Rapid fault detections in the configuration and rapid corrections eliminate detrimental effects on the product cycle.
  • Easy and fast service restorations in case of process failure encourage system reliability.
  • CM enhances customer satisfaction and helps in cost optimization.

Some well-known CM tools

Configuration Management with Ansible

Now, let us understand how to leverage Configuration Management with Ansible.

What is Ansible?

Ansible is an utterly simple open-source automation & orchestration tool that handles Configuration Management (CM), application deployment, cloud provisioning, cloud services as well as other IT tools.

Furthermore, Ansible can:

  • easily configures IT systems to provide infrastructure as code.
  • use the playbook to describe automation jobs written in YAML syntax.
  • enable multi-tier deployments.
  • interrelate all the IT systems and prototype the IT infrastructure.
  • work by multi-node orchestration and needs no agent
  • push and pull ansible modules (small programs) on the nodes
  • manage inventory in host files (simple text files)
  • control the actions of a specific group in the playbook.

Some advantages of Ansible

  • It is an open-source FREE-to-use tool.
  • It is easy to operate and does not require any specialized administrative skill set.
  • It can seamlessly orchestrate large IT ecosystems without an agent.
  • It is completely safe and secure.
  • Being lightweight and consistent, there are no constraints on its compatibility with different Operating Systems and Hardware.

Let us get familiar with some common terms in Ansible

  • Control Node: A control node is a system that hosts Ansible installations as well as sets up its connectivity to the server. There can be multiple control nodes, in fact, any system can be set up as a control node.
  • Managed Nodes: A control node manages remote nodes. These remote notes are known as Managed Nodes. Ansible entails managed nodes to be accessible through SSH.
  • Inventory is a file that contains data regarding Ansible client servers. It is also known as a host file as it contains a list of hosts managed by Ansible.
  • Task: Every action to be performed is a task. In Ansible, a unit of work that is to be executed on a managed node is a task.
  • Playbook: Ansible playbooks are the way of sending commands to remote systems via scripts. It designates tasks and roles to the target hosts, thereby orchestrating multiple servers from diverse setups in one play.
  • Roles: It is a way to automatically organize tasks, files and handlers in a predefined structure known to Ansible.
  • Handleris a task that triggers changes in the service status. It is activated by receiving a notification from the notifier.
  • Notifier:A notifier is a segment assigned with the task to notify the handler if the output is changed.

How does Ansible Works?

The flowchart given below explains the working of Ansible.

What is YAML?

YAML syntax is a data-serialization language which is very easy for humans to read and write. Also, YAML is much simpler as compared to data formats like JSON and XML. YAML is a powerful syntax to automate IT requirements. Henceforth Ansible uses YAML for creating playbooks.

Every YAML file starts with a list of items. Each item represents a list of key pairs/value pairs known as a dictionary or hash.

Optionally all the files in YAML begin with ‘—’ and end with ‘…’. This indicates the start and end of a document. Also, all the members of the list begin at the same indentation level starting with “- “.

What is an Ansible Inventory?

An Ansible inventory file contains a list of hosts (or a group of hosts) on which commands, tasks, and modules are operated in a playbook. The format of these files depends on the Ansible ecosystem and its plugins.

An inventory file contains a list of managed nodes called host files. It organizes these host files to create a nesting group for scaling.

For an inventory, the default location is a file defined by: /etc/ansible/hosts

An inventory file at the command line is defined by: -i option

INI format of an inventory file:

    mail.example.com
  
      [webservers]
      foo.example.com
      Bar.example.com
  
      [dbservers]
      One[1:50].example.com
      two.example.com
      three.example.com
  

Types of Ansible Modules

Ansible has a large library of modules to offer its users. Some frequently used Ansible modules are

It is important to note that

  • All the Ansible modules return JSON format data
  • Ansible modules must be idempotent
  • Ansible modules can trigger changes in the output by using handlers to run extra tasks.

Example of a Playbook

Below is an example of a playbook verifying-apache.yml that contains only one play.

    - hosts: webservers
      vars:
      http_port: 80 max_clients: 200
      remote_user: root
      tasks:
  
      -  name: ensure apache is at the latest version
          yum:
              name: httpd
              state: latest
  
      -  name: write the apache config file template:
          src: /srv/httpd.j2
  
          dest: /etc/httpd.conf
      notify:
  
          - restart apache
  
      -  name: ensure apache is running
          service:
              name: httpd
              state: started
  
      handlers:
          - name: restart apache
  
          service:
              name: httpd
              state: restarted
  

Conclusion

Ansible is a minimalist IT automation tool that has a gentle learning curve. The reason is its part to its use of YAML for its provisioning scripts. It consists a great number of built-in modules used to abstract tasks such as installing packages and working with templates.

VI – Automation Testing Frameworks Tool Installation and some hands-on examples

Selenium

It is a popular open-source web-based automation tool. In this tutorial,we will learn how to install Selenium Webdriver.

Steps to be followed:
  • Download and setup Selenium server
  • Downloading ChromeDriver
  • Integrating selenium to Eclipse

Step 1: Download and setup Selenium server

  • Locate selenium using

    locate selenium

    command. If it is not present, then use the following command to update the packages.

    sudo apt-get update

    Download and setup Selenium server

  • Install selenium using below command:

    sudo pip install selenium

    Download and setup Selenium server

Step 2: Downloading ChromeDriver

  • Download the most preferable version. To execute the same, find out the Google chrome version available in your system. Open Google Chrome >> Click on three dots >> Help >> About Google Chrome.

    Downloading ChromeDriver

  • Now you can see the Google Chrome Version.

    Downloading ChromeDriver

  • Go to ChromeDriver downloads and select the version as shown below.

    Downloading ChromeDriver

  • You will be redirected to the page shown below. Select for Linux zip file.

    Downloading ChromeDriver

  • Now find the downloaded file in your system. For that you must extract the zip file. Ensure to copy the path and keep it for use.

    Downloading ChromeDriver

Step 3: Integrating Selenium to Eclipse

  • From your desktop, open the eclipse. Develop a new Java project in Eclipse. Right click on the project and make a new package. Once it is created, build a new class inside the package.
  • Further, configure the build path just by doing a right click on the developed project as shown below.

    Integrating Selenium to Eclipse

  • Click on Add external jar files for Selenium as shown below. The pop-up window will appear and will ask to select a file. Choose the Selenium jar file in the downloads section.

    Integrating Selenium to Eclipse

  • Click on Apply and Close.
  • You can see the referenced jar files as shown below.

    Integrating Selenium to Eclipse

Let’s have a look at hands-on Demo (Selenium – Test Case)

A test case is written for logging into yahoo.com.

  • Create a one
    first.java

    file to setup the selenium server jar file. Then we create a web driver instance for the same. And finally, we use

    driver.get()

    navigating to the respective URL and passing the username for the same.

  • Write the following code in the first.java file.

    package test;
    import java.util.concurrent.TimeUnit;
    import org.openqa.selenium.By;
    import org.openqa.selenium.WebDriver;
    import org.openqa.selenium.chrome.ChromeDriver;
        public class first {
            public static void main(String[] args) throws InterruptedException {
            System.setProperty(“webdriver.chrome.driver”, “/Path_To_Your_Chrome_Driver”);
            WebDriver driver = new ChromeDriver();
            driver.manage().window().maximize();
            driver.manage().deleteAllCookies();
            driver.manage().timeouts().pageLoadTimeout(40, TimeUnit.SECONDS);
            driver.manage().timeouts().implicitlyWait(30, TimeUnit.SECONDS);
            driver.get(“https://login.yahoo.com”);
            driver.findElement(By.xpath(“//input[@id=’login-username’]”)).sendKeys(“[email protected]”);
        }
    }
    
  • Right click on the written code and select Run As -> Java Application.
  • On executing the test case, you can see the output as shown below.

    Let’s have a look at hands-on Demo
    Let’s have a look at hands-on Demo

TestNG

Steps to be followed:
  • Download and set up TestNG
  • Integrate TestNG in Eclipse

Step 1: Downloading and set up TestNG

  • Open the terminal and type the command given below to download the TestNG.
    wget http://www.java2s.com/Code/JarDownload/testng/testng-6.8.7.jar.zip
  • Unzip the TestNG jar file using the command given below:

    unzip tes tng-6.8.7.jar.zip
  • You can see the testng same as selenium server in the downloads section.

    Downloading and set up TestNG

Step 2: Integrating TestNG in Eclipse

  • Go to the project in eclipse, right click on the project, select Build Path, and select Configure Build Path. Select Libraries and click on Add External JARs…. Browse and select the TestNG jar file. Refer to Lesson 6 Demo 1 to know how to configure the build path.

    Integrating TestNG in Eclipse

  • Click on Apply and Close.
  • You can see the referenced jar files for Testng as shown in the image below.

    Integrating TestNG in Eclipse

  • Go to the Help tab in the Eclipse and choose Eclipse Marketplace to configure TestNg.

    Integrating TestNG in Eclipse

  • Type TestNg in the find bar and click on Install. Select TestNG for Eclipse as shown in the below screenshot.

    Integrating TestNG in Eclipse

  • Once the installation is done, click on Confirm.
  • Select the checkbox I accept the terms of the license agreement and click on Finish.

A Glimpse into the Hands-on-Demo (TestNG – Test Case)

So, this is the place where we began to write the test case that the web page title should be the “Google”. Otherwise it failed the test case.

Testing the automation script
  • Open Eclipse, select the project, right click and select New-> Class. And provide the required information.
  • Copy the below code and paste it into the created class to write the TestNg test case. Do provide your own path for your chrome driver.
    package test;
    import org.testng.annotations.Test;
    import org.openqa.selenium.WebDriver;
    import org.openqa.selenium.chrome.ChromeDriver;
    import org.testng.Assert;
    import org.testng.annotations.AfterTest;
    import org.testng.annotations.BeforeTest;
        
    public class testngfirst
    {
        public String baseUrl = "https://www.google.com/";
        String driverPath = "Path_To_Your_Chrome_Driver";
        public WebDriver driver ;
        
        @BeforeTest
        public void launchBrowser() 
        {
            System.out.println("launching Chrome browser");
            System.setProperty("webdriver.chrome.driver", driverPath);
            driver = new ChromeDriver();
            driver.get(baseUrl);
        }
        
        @Test
        public void verifyHomepageTitle() 
        {
            String expectedTitle = "Google";
            String actualTitle = driver.getTitle();
            Assert.assertEquals(actualTitle, expectedTitle);
        }
        
        @AfterTest
        public void terminateBrowser(){
            driver.close();
        }
    }
    
  • Right click on the written code. Select Run As -> TestNG Test. On executing the above on TestNG Test, you will get the following output.

    Testing the automation script
    Testing the automation script

V – Automation Testing Frameworks – Selenium & TestNG

Automation Testing – Definition

Automation testing is a technique applied to the software testing system wherein specific software tools are used to monitor the test execution. Also, the real test results get compared with the estimated results. The testing needs a meager human intervention here.

Automation Testing Life Cycle

Life-Cycle

During each of the software testing processes, you need to follow the Software Testing Life Cycle to get the best results for the software. Automation must adopt a similar process and follow the Automation Testing Life Cycle to get the best automation frameworks and fetch the best results.

Correct Automation Tool Acquisition

Automation testing is dependent on the tools to a wider extent. Searching for the exact automation testing tool is a crucial phase while running the automation testing life cycle. While you are searching for the automation tool, you must consider the budget and the types of technologies that will be adopted in the project along with the known tools that have resources on board.

I am going to have a wide discussion with you basically on the below two crucial automation tools.

  • Selenium
  • TestNG

Selenium

  • This tool has a portable framework that provides automated web application testing along with open-source features.
  • Contains great flexibility during the ongoing functional testing and regression test cases.
  • It supports cross browsing at those points where the test cases run across various platforms at the same time.
  • Creates and develops browser-based regression automation suites that are robust and perform test case execution.

Advantages

  • Framework support and Language
  • Multi-Browser Support
  • Implementation Ease
  • The quick speed of collateral test execution
  • Meager Hardware usage and Regular Updates

The Architecture of Selenium WebDriver

WebDriver-Architecture

Selenium IDE

  • Selenium IDE (Integrated Development Environment) is a Firefox plugin. It is the easiest framework and so simple to execute available in the Selenium Suite.
  • Permits recording and playback all the scripts
  • You can also create scripts by accessing Selenium IDE along with Selenium RC or Selenium WebDriver to write the most advanced and resilient test cases.

Selenium WebDriver

  • This is a framework that comes with browser automation and accepts commands and sends them back to the browser
  • The process is implemented via a browser-specific driver
  • This webdriver communicates with the browser and monitors and controls its every action
  • Also facilitates several programming languages such as C#, Java, Perl, Python, Javascript, and Ruby

Selenium Grid

  • This one helps you to run tests on various systems instead of running different browsers in parallel mode.
  • This further runs multiple tests simultaneously against different systems that run different browsers and operating systems.

Prerequisites for Automation Testing with Selenium

  • JAVA 1.8 and above OR Python
  • Eclipse for JEE Developers
  • Selenium 3.0
  • Browser Drivers

TestNG – Definition

The full form of TestNG stands for Test Next Generation. It is open-source test automation that is based upon the Java framework. The tools are highly inspired by JUnit and NUnit. It helps in developing functionality like grouping, test annotations, parametrization, prioritization, and techniques sequencing in the code. Moreover, this tool gives you various test reports in a detailed form.

Reasons for Using TestNG with Selenium

Most Selenium users find this tool comfortable due to its several advantages over JUnit. Some of the main features of TestNG are:

  • The simple functionality of annotations is so easy to understand. The annotations mostly come with the preceding symbol that is @ in TestNG and JUnit.
  • Generates accurate format reports that talk about total test details that can be generated
  • Several test cases can be gathered and can be converted to a testing.xml file. The execution needs to be prioritized for conducting the tests.
  • The same test case can be executed multiple times by using the keyword “invocation count”
  • The cross-browser testing can also be executed
  • Simple and seamless migration is possible with Jenkins and Marvel
  • This tool generates various reports in several varieties of readable formats.

TestNG Framework Architecture

Framework-Architecture-2

A Wrap-Up

The most productive method to achieve your testing goals within the range of the suitable timelines and inadequate resources is to adopt Automating testing. However, do ensure you execute the total automation testing life cycle if you are on the lookout to get the expected results and to test the application process in the most preferred manner. Executing automation tests with zero plans or any sequence can lead to load scripts that tend to fail and creates manual intervention also.

IV – Setup Jenkins With Add-Ons Plugins and Some Hands-On

In this blog, my effort is to direct you through the Jenkins installation process. So let us move straight into the process. Just begin according to the following steps for Jenkins installation in combination with the suggested plugins.

The process can be epitomized in the five below steps:

  • Java Version 8 installation – Jenkins belongs to a Java based application. So Java is compulsory
  • Download Jenkins File – This is required for Jenkins installation
  • Jenkins installation – Deploy Jenkins file on a web server for running Jenkins
  • Firewall adjustment – Open 8080 (default port) for running Jenkins
  • Suggested Plugins setup and installation – Install Jenkins and the list of plugins that are suggested by Jenkins

Installing Java

Jenkins is a Java application. Hence it needs Java 8 or can be installed later on the system. At this moment we shall install OpenJDK 11. It is an open-source implementation of the Java platform. You need to run the following commands as the root or user with sudo privileges or root to install OpenJDK

$ sudo apt update
$ sudo apt install openjdk-11-jdk

Soon the Java development kit gets installed, do verify the kit by checking the JDK version by the following command:

$ java – version

Jenkins Download and Installation

Now we will activate the Jenkins APT repository, download, and then install the Jenkins Package.

Further, import the GPG keys of Jenkins Repository by using wget command.

$ wget -q -O – https://pkg.jenkins.io/debian/jenkins.io.key | sudo apt – key add –

Thereafter, add the Jenkins Repository to the system repository with

$ sudo sh -c 'echo deb http://pkg.jenkins.io/debian-stable binary/ > /etc/apt/sources.list.d/jenkins.list'

The moment the repository is activated, update the apt package list and install the latest version of Jenkins with the following command.

$ sudo apt update
$ sudo apt install jenkins

Later, verify the Jenkins service status by using the following command:

$ systemctl status jenkins

Firewall Adjustment

In case if you are installing Jenkins on a remote Ubuntu server that has firewall security, you need to open the port 8080.

If you look forward to allowing Jenkins to have access from a specific IP range, for example allowing connections only from the 10.10.10.0/24 subnet, use the following command

$ sudo ufw allow proto tcp from 192.168.121.0/24 to any port 8080

If you are looking to allow Jenkins from anywhere then run the command

$ sudo ufw allow 8080

Jenkins Setup and Add-on Plugins

For setting up the Jenkins, you must open the browser with your domain or an IP address that is followed by port

8080

like

http://your_ip_or_domain:8080

The page will be displayed as below. It will prompt you to enter the Administrator password that is created at the time of the setup process.

unblock-jenkin

During the setup process created a password, which you can get by using

$ sudo cat /var/lib/jenkins/secrets/initialAdminPassword

Now you will get a 32 char long alphanumeric password like

Output
06cbf25d811a424bb236c76fd6e04c47

Later, a setup wizard will appear that will ask you about the installation of the suggested plugins or else if you wish to select any specific plugins.

customise-jenkin

Chose to “Install suggested plugins” and the installation process will start

getting-started

Soon after the setup process gets completed, Jenkins will begin. It will get redirected to the Jenkins Dashboard that is logged in as a Admin User created in the previous steps.

jenkins

Let us head over to the installation of the most used Plugins on Jenkins Jenkins generally gives you two methods to install the plugins on the controller:

  • Using the “Plugin Manager” in the web UI.
  • Using the Jenkins CLI install-plugin command.

If you use Web to install plugins then it is through the Manage Jenkins>Manage Plugins. Below the Available tab, there are listed all the available plugins. Else, you can search by Filter options given over the right hand side.

plugin-manager

Choose the Plugins such as Maven, Git, AWSEB Deployment Plugin, .NET SDK Support, and several similar ones. Thereafter, click on the “Install without restart” tab to get the installation of the selected plugin done.

Let us now configure the installed plugins for future jobs by using Manage Jenkins > Global Tool Configuration option.

global-tool
maven

Develop Your First Ever Jenkins Build Job

The Jenkins freestyle job is the core fundamental of Jenkins CI for starters.

Jobs in Jenkins basically handle the build of the project. So go ahead and select New Item. Thereafter enter the name of the job and choose the Jobstyle project. Press the OK button.

enter-an-items

On Next Screen, General Tab enters Description about the Jenkins Job.

general

The second Tab will take you down to the Source Code Management. Now choose Git there and mention your GIT repository URL and the branch name to create and build the code.

source-code-management

Further now is Build Trigger moving on to auto triggered for building the Jobs after the commits occurred to the mentioned branch as above.

This field schedule follows the syntax of cron (with minor differences). Specifically, each line consists of 5 fields separated by TAB or whitespace:

  • MINUTE
  • HOUR
  • DOM
  • MONTH
  • DOW
build-trigger

Examples:

# Every fifteen minutes (perhaps at :07, :22, :37, :52):

H/15 * * * *

# Every ten minutes in the first half of every hour (three times, perhaps at :04, :14, :24):

H(0-29)/10 * * * *

# Once every two hours at 45 minutes past the hour starting at 9:45 AM and finishing at 3:45 PM every weekday:

45 9-16/2 * * 1-5

# Once in every two hour slot between 8 AM and 4 PM every weekday (perhaps at 9:38 AM, 11:38 AM, 1:38 PM, 3:38 PM):

H H(8-15)/2 * * 1-5

# Once a day on the 1st and 15th of every month except December:

H H 1,15 1-11 *

And the last part – The Build Section. Here select the Execute Shell from the many build steps that are concerned to the project.

At this stage, and at this place we shall use Execute Shell to run Javac and Java command for building and executing Java project of Git repository. Thereafter Save the job for building it further.

build

Now to reach to the Job Detail page for building the Job, use the left panel “Build Now” option.

project-1stjob

In the build page, you will find the Console Output that talks about all the steps of Jenkins Job.

consoul-output

Conclusion

I am sure you are now confident enough after having this detailed Jenkins Installation guide. So go ahead and set up it. Install the Jenkins Plugins also. For all the DevOps engineers, it will be now easy to configure Jenkins. You can manage plugins and then set up global configurations for all those plugins. I also hope that these practical examples and hands-on functionalities will help you out in configuring SCN, then trigger build on the particular time span, and know the ways to build the job by using the shell script. Good luck for now!

Let’s Work together!

"*" indicates required fields

Drop files here or
Max. file size: 5 MB, Max. files: 2.
    This field is for validation purposes and should be left unchanged.