E-Commerce Solution Providers, The Way to The Future

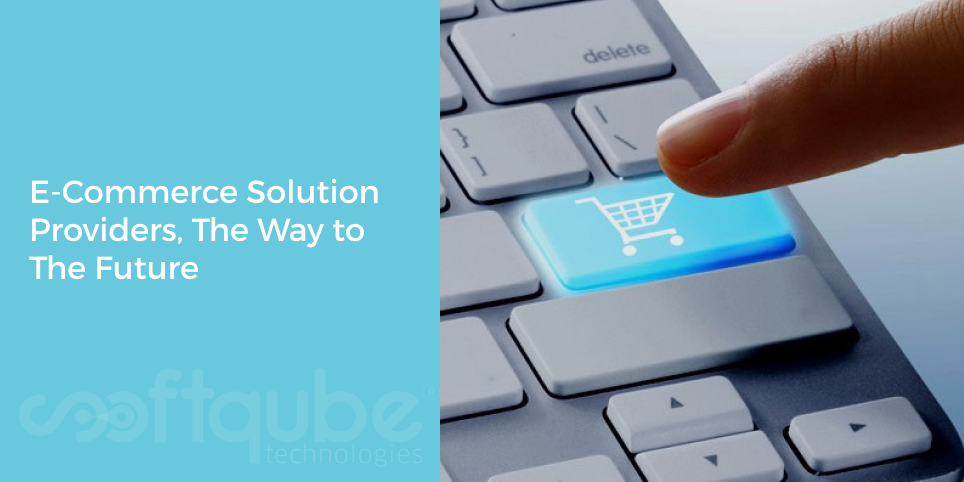
Technology is thriving and continuing to evolve day by day. We also need to cope up with global trends and technologies and as a result, our life is moving at a fast pace. Every year we are seeing new trends and innovations in phones and new applications are being launched to make it easier for the end users to have access to all the information, whenever and wherever they are. The influx of latest technologies has motivated enterprises to think about having a global presence. In this world of globalization and digitization, e-commerce has become a fad among enterprises and retailers throughout the world.

E-commerce is a booming sector in the IT field and has created a huge buzz over the last few years. Since smart phones and internet are become indispensable parts of our life, that’s why business houses are now showing their inclination towards online marketing and they are trying to catch more customers towards their products and want to fetch some money out of it.

eCommerce Solution Providers

Business houses, retailers and companies want to present themselves in a so impressive way that they can entice more customers towards them and for that they need some best e-commerce solution providers that offer cost-effective and fine quality services such as website designing, development of mobile applications, search engine optimisation, social media optimisation and marketing, content writing services and a lot more. Below we are summarizing some top-notch e-commerce solution providers’ names that are successfully able to inscribe their names as some top leaders in this profession.

  • CSS Chopper- As one of the leading e-commerce solution providers, they have got huge appreciation from their clients. Their expert teams are always dedicatedly serving the customer’s requirements and need. They always remain committed towards their job.
  • 7 cloud tech- They are adroit at this domain and have extensive product knowledge which helps them to retain their position as one the leading e-commerce solution leader.
  • Sparx IT Solutions- They have some ardent team members who work strenuously to build outstanding e-commerce platform for their clients. If anyone is looking for renowned e-commerce platform building, then without wasting any time, please be in touch with them.
  • OctaShop E-retail services- OctaShop E-retail is a leading name in the realm of e-commerce solutions and has created a niche for themselves by satisfying thousands of customers. They always provide cost-effective yet good quality services towards their customers. That’s why they already have earned some loyal customers.

A company should hand-pick the best e-commerce solution provider for them after evaluating all possible options. Companies like Softqube Technologies have an in depth knowledge for helping you choose and pick out the best e-commerce solution provider. Their skilled team will ensure that you get the best that your money can buy.

Reasons to Seek Custom PHP Development Solutions

There is demand for the custom PHP Development Company at a rapid speed. Free open source coding facility and flexibility are the main reasons that allow business owners to create a web app as per the needs of the individual.

PHP web development service benefits a lot when business houses are not charged a license fee for open source coding and can meet their development needs in a much personalized and cost effective manner. Small and medium scale enterprises seek professional software development firms for catering to their industry through custom web development service.

Before making a choice of software Development Company, look at the reasons for seeking help of custom PHP development solutions.

Custom PHP Development

Reasons Behind Seeking Help of Custom PHP Development Solutions

  • No scope for any communication gap: Custom PHP development offers effective communication with the programmers and ensures regular updates on the progress of the project. It evaluates the performance of programmers and instructs them about important changes in the initial stage.
  • Qualified and skilled developers: Hire professionals who are experienced and have knowledge of advanced programming technology for producing the most personalized results. It may cost you more, but it is worth it. The additional cost can be avoided if you get custom PHP web Development Company at your service. They assign a dedicated resource to cater to your development needs and give you the most personalized experience.
  • Cost efficient: With custom PHP development, business owners can save a significant amount of money in hiring and training the resources. It is the most cost effective solution that prepares the software system without making payment of license fee. The software maintenance and up gradations cost is reduced primarily by availing custom PHP web application services.
  • Quality service: The best thing about web app development service is that you are assured customized solution with great quality. This includes web maintenance service for validating errors or modifying or adding necessary features.
  • Advanced technology: Companies ensure to have the latest update on PHP programming to deliver the most innovative and functional site. This not only helps in spreading business activity but also offers you the best investment in development.
  • By now, you know why you should avail the service of best custom PHP Development Company. You may directly speak to your customer executive and discuss your requirements so that they can formulate a strategy for your business type. For the best outcome, avail service of Softqube Technologies.

Creating Email Verification in PHP

PHP is used for developing web applications; we all are aware about this. However, PHP can be used for other things as well. Today, in this blog post; we will see how emails can be verified using PHP.

The common security feature during user registration process is email verification. It is necessary to create it as per the industry best practices in order to avoid certain security risks.

Here, we will see how email verification can be created with PHP?

Email Verification

First of all, let’s begin with registration form:

<form method=”post” action=”http://mydomain.com/registration/”>

<fieldset class=”form-group”>

<label for=”fname”>First Name:</label>

<input type=”text” name=”fname” class=”form-control” required />

</fieldset>


<fieldset class=”form-group”>

<label for=”lname”>Last Name:</label>

<input type=”text” name=”lname” class=”form-control” required />

</fieldset>


<fieldset class=”form-group”>

<label for=”email”>Last name:</label>

<input type=”email” name=”email” class=”form-control” required />

</fieldset>


<fieldset class=”form-group”>

<label for=”password”>Password:</label>

<input type=”password” name=”password” class=”form-control” required />

</fieldset>


<fieldset class=”form-group”>

<label for=”cpassword”>Confirm Password:</label>

<input type=”password” name=”cpassword” class=”form-control” required />

</fieldset>


<fieldset>

<button type=”submit” class=”btn”>Register</button>

</fieldset>

</form>

Later on, we will use this database structure:

CREATE TABLE IF NOT EXISTS `user` (
`id` INT(10) NOT NULL AUTO_INCREMENT PRIMARY KEY,
`fname` VARCHAR(255) ,
`lname` VARCHAR(255) ,
`email` VARCHAR(50) ,
`password` VARCHAR(50) ,
`is_active` INT(1) DEFAULT ‘0’,
`verify_token` VARCHAR(255) ,
`created_at` TIMESTAMP,
`updated_at` TIMESTAMP,
);

Once this form is submitted then the input is to be checked. After input verification, new user is to be created:

// Validation rules
$rules = array(
‘fname’ => ‘required|max:255’,
‘lname’ => ‘required|max:255′,
’email’ => ‘required’,
‘password’ => ‘required|min:6|max:20’,
‘cpassword’ => ‘same:password’
);

$validator = Validator::make(Input::all(), $rules);

// If input not valid, go back to registration page
if($validator->fails()) {
return Redirect::to(‘registration’)->with(‘error’, $validator->messages()->first())->withInput();
}

$user = new User();
$user->fname = Input::get(‘fname’);
$user->lname = Input::get(‘lname’);
$user->password = Input::get(‘password’);

// You will generate the verification code here and save it to the database

// Save user to the database
if(!$user->save()) {
// If unable to write to database for any reason, show the error
return Redirect::to(‘registration’)->with(‘error’, ‘Unable to write to database at this time. Please try again later.’)->withInput();
}

// User is created and saved to database
// Verification e-mail will be sent here

// Go back to registration page and show the success message
return Redirect::to(‘registration’)->with(‘success’, ‘You have successfully created an account. The verification link has been sent to e-mail address you have provided. Please click on that link to activate your account.’);

Once the registration is complete, the account will remain inactive till the email has been verified. This feature confirms that user is the real owner of the email id and this helps to prevent spam, unknown email usage as well as information leaks.

It is a very simple process, once the new user is created; an email containing verification link is to be sent to the email id that was entered during registration process. Users will be unable to login and use web applications till the time he/she clicks on verification link and confirms the email address.

Regarding verification links, there are few thinks to note down: It must have a randomly generated token which must be long enough and useful for certain time period. The user identified must also be included so that potential attacks could not brute force across multiple accounts.

Wind up:

Whatever codes we have included here are only for educational purpose and are not completely tested. So, if you wish to use them in any web application then kindly test the same.

These are written in Laravel Framework however can be easily used in PHP. The verification code is valid up to 48 hours hence it will be good to use such application that can eliminate inactive users with expired verification codes.

Hope you liked this post. For more such updates about PHP; stay in touch with Softqube Technologies; provider of cost effective php development services.

How to Back up Your Joomla Website?

In this tech world, you can see that anytime any software can crash, due to server issues your website may stop working or may face other issues. Hence, today it is advisable to have a back up of each and everything including your Joomla website because never know when it will stop working.

Joomla Website Backup

Now, suppose your website is on Joomla platform then the question is how can you have the back up for the same? Having a website back up is your sole responsibility as not having one can put you into unrecoverable problems, chances are there that your website may get hacked.

May be you forget to apply a security update, may be your website host server is not as much secure as you need. You may be using an extension with a huge security hole. This can happen anytime when you are actually busy spending your weekend time with your loved ones and when you are back, you find yourself in deep trouble!

Not using a Test Site:

Have you made some changes to your site? Have you tested it anytime? Have you installed the extensions on an active site or any widget which has led your website to crash?

You realized and quickly you installed that extension however the result is your website doesn’t work anymore. There are various clones of Joomla site to test from. In case all goes well, then the changes are applied to a live site.

However, not all of us bother to do so and just without testing anything; we directly experiment it on live website. Yes, I can understand that with lots of duties and responsibilities; there remains very less time for testing.

So, what’s the solution?

Well, every problem has a solution. “Where there is a will; there is a way”. So, don’t worry; you can use Akeeba Backup- an extension that is designed for backing up your Joomla site.

Yes, apart from this; there are several others that are available in the market but this is the most recommended one. It is useful to have a quick back up for your Joomla site and this can be done anytime you want; may be monthly, weekly, daily etc.

The old ones can be deleted. You can easily shift your website, clone it, store it, repair or re-install it. Anything you want to do with your website; Akeeba is there for you.

An important note: It is available for free. So, just your small effort of installing this extension can help you to stay away from huge problems and hence your weekends will never be messed up.

Prefer to have Server level backups:

Your Joomla website is after all a site; not any tool or any generator hence it will do what it is meant for. So, it is advisable to do backups at server level. It is not possible for everyone to do this.

Those websites that are hosted on GoDaddy or Dreamhost or any of bigbox companies then server level backups are not for you. If you have your own server, multiple websites and clients then server level back ups are for you.

This will save you from logging in and logging out every time from Joomla Admin Panel. cPanel has complete backup system which is preinstalled. Setup your backup accounts for a particular time period say daily, monthly or weekly.

The backup can then be stored on server as well as off the server in any remote location. Other server control panels have the same functionality and hence you must set aside the time to set up properly.

Take Away:

Well, we have suggested the most popular backup solution for your Joomla site. Let us know what is your suggestion about the same? If you have any better solution then we will be glad to know the same.

In case, in any way this blog post has helped you then don’t forget to share it. For more such useful tips related to Joomla; stay tuned to Softqube Technologies; well known Joomla web development Company.

Creative Cloud From Adobe – An Amazing Application To Use

Till now, we have been using many applications from Adobe such as Adobe Photoshop, Adobe illustrator and lots more. Creative Cloud is yet another powerful application by Adobe.

amazing application that is highly recommended by many of the web designers as well as graphic artists. It offers users access to several features for creating and enhancing info-graphics, print ready displays as well as video editing.

Adobe Creative Cloud

This can be used to develop functional web pages and offers web developers some of the best tools and services available. It was launched in 2011 and during 2014, it attracted nearly 2.3 million subscribers.

Here we have few good reasons for using this amazing app:

  1. Pixel Magic: It is very useful for grid design. Many developers need a top notch grid representation when making a website plan. Here, it is easy to align the design with a pixel grid at the time of creating graphics in illustrator.

    Further, it offers wide range of web design profiles to its users which can easily utilize built in grid which can set colour spaces to RGB values thus offering a complete control on shapes and colours.

    We all know that mobile devices have small screens and hence the new generation of desktop screens are becoming better with a resolution of 2560 x 1440px.

  2. Libraries: One of the software features is TypeKit Library that offers access to an amazing collection of fonts and icons in order to give a unique look to the web design.

    Along with some surprising fonts, there are many icons available in various styles ranging from humorous as well as social logos to highly professional ones.

    Libraries from Creative cloud have several different applications that allow designers to make most use of translation management system thus allowing them to integrate content from different sources.

  3. Resolution: Web Designs were not affected much by rastor or vector design till the time creative cloud was released. This was actually an issue while resizing images.

    Web Developers used to prefer vector images instead of losing resolution while resizing pixel based raster images. Adobe software allows developers to use both formats in order to align and adjust web page elements.

    This allows designers to easily apply such features like as fonts, scalable images and many more such related features that can empower designers with new functionality.

    Web content can easily include graphics which are scalable without losing image quality. This can easily format graphics for any device such as smart phones, desktops.

    Working with Raster: Creative cloud improves working with Rastor aspect of the entire web page. This allows users to place PSD files easily and intuitively. It allows layers and composites from image editing applications such as Photoshop.

    Users can easily manage and display multiple versions of same image. Content can be optimized at any desired level. New Photoshop versions include ability to generate assets, a feature that works in a smooth manner with Creative cloud thus allowing developers to alter their visual content.

Take Away;

The real power of creative cloud subscription is it being the gateway to several other apps which bring web development to completely new level.

Hope you learnt something new from this post. For more such posts related to web development, stay tuned to Softqube Technologies; expert Web developers India.

Strengthen Your Online Business with Express Engine Web Development

Web Development is related to several numbers of things. Itb can be developing web application, an online eCommerce platform etc and lots more. Express engine development is yet another part of this industry.

It seems to be boon for web development industry as it is developed to render real time web applications and sites for all online businesses. PHP Development services include an extensive service system that is available for quick response.

What is Express Engine all about?

It is a robust platform that contains error less features of PHP. We all know that PHP is a server side language that is equally important for integrating features such as flexibility and scalability in website.

Express Engine Development
The powerful framework of this platform is used by web developers to develop remarkable websites and applications that have matchless features. An increase in demand of this unique content management system has forced businessmen to use Express Engine development to boost business and credibility in digital industry.

The powerful backing of MYSQL database is enough to develop tailor made websites. It offers enhanced flexibility to developers for creating trendsetting web solutions. The websites developed in this manner are able to get more business in order to reach at a level of success.

An amazing feature of PHP is useful in integrating various advanced features as well as functions in a website. Express Engine is a blend of new and advanced technologies which are necessary for businessmen to boost their business.

PHP development Services for Express Engine Development:

PHP Development Services provide out of the box results. Here are they:

  • Future proof Coding: Expert developers use validated and proven codes which are followed in compliance to standard guidelines of web development industry.
  • Proven methodologies: We have a team of developers who strive hard in providing innovative strategies in the process. This makes web solutions reliable and future proof.
  • Customer satisfaction: Developers try to render such web solutions that meet your requirements thus providing 100% customer satisfaction. This enhances user experience as well as website credibility.
  • Authorized & Secured: Every client and developer is bound to follow non disclosure agreement so that privacy and confidentiality of clients can be maintained.
  • 24/7 Technical Support: With professional team, clients can get uninterrupted as well as efficient assistance throughout the project. Expert developers are quickly available at just a single call.

Take Away:

The matchless features of PHP have forced developers as well as entrepreneurs to opt for Express Engine development so that their presence can be noted in digital industry.

For newbies, it is difficult to have a niche and hence it is necessary to get in touch with well known PHP Development Company like Softqube Technologies who can share their expertise in rendering reliable, secure PHP web solutions.

PHP Developer can be hired based on the business prospects as well as their needs so that beneficial web solutions can be easily offered.

Hope you liked this post. For more such updates about PHP, stay tuned with us.

Docker and PHP: Working with Both Simultaneously – Part 2

So, in previous part; we learnt about basic things related to Docker such as its meaning, machine launched and installation process, Server set up; number of servers required, developing new machine with Windows via Command Prompt and lots more. If you have missed the first part then click here.

In the end, we had a term “Docker Hub”. So, now here, we will know what this Hub is all about?

Let’s begin: Meaning of Docker Hub

It is useful when we need to create an image from scratch. It is a cloud service that is useful to developers for storing and distributing images. Here; images that can be used as a base for other images are to be found.

Docker Hub

Through the images stored on this hub; Docker image is available that is used to run PHP applications on Apache Server. This image can be found using the search box from the Hub’s main page.

This image installs Apache and PHP on Docker machine. If you use this image then you must follow below steps:

  • Docker Pull Command is used to get the image.
  • The effect of this command is that apache image is to be installed on Docker Machine. Before we move ahead; we must check that the Apache image is created without any container running.
  • To fulfill this; below mentioned commands can be used :
    Command: docker images
  • Now, we can run and test the image with this command.

    Docker run –d –p 80:80 tutum/apache-php

  • Then, open the browser and type this address in the address bar: http://192.168.99.102. This is the docker host which may be different in your test.
  • One can check to see the existing containers and one can see that one container is running:
    Command: docker ps
  • Run the docker image from Docker file for loading custom PHP application:

    The apache-php image can be used as a base image for custom PHP application. First of all, we need to create certain folders in our structure and one can see from the next images.

    One can create PHP application folder that has PHP Apps available in D:\ and it has the file as well as the sample folder. The sample folder contains PHP Script and info.php. The PHP Script, info.php offers information about PHP configuration.

    Before obtaining the image from “Dockerfile”, we must build that file. For that, we must navigate to its location and then execute the below command.

    Further, it is to be checked as to when php info image was created. For that, one must run the image command.

  • Push and Pull Docker image from Docker Hub: To do so, one must first start with the previous php machine.

    One needs to create an account in the Hub. Remember the user name and password as the same will be used to login to repository after pushing an image therein. Once the process stops, available tags can be found in repository as no tag was specified while pushing the image.

Take Away

So, from this article; you learnt lot of things about Docker such as pulling image from its Hub, Installing it on Windows etc. The most important thing is running a PHP Script inside Docker file.

Hope you liked this post. For more such details; stay tuned to Softqube Technologies; a PHP Web Development Company in India.

Docker and PHP: Working with Both Simultaneously

We all know that PHP is widely used for developing web applications as well as for various eCommerce platforms. Here, we will understand how docker can be used with PHP.

First of all, let’s understand how Docker can be installed on Windows? Creating a machine, get the image from Docker hub and the most important one how PHP script can be run using Dockerfile.

However, before we proceed ahead; you might have some questions as to what Docker actually is? So, let’s take a look at it and understand it before working with the same:

Docker and PHP

What is Docker?

It is an open source project which automatically deploys all applications inside the software containers thus offering an additional layer of abstraction and automation of operating system level virtualization on Linux.

It is one of the tools that can have a good package which includes an application along with its dependencies in a virtual container which can be used on any Linux Server.

Installing Docker on Windows:

  • First of all, download the Docker Toolbox.
  • Now run the .exe file and go on with the suggested steps.
  • At certain point of time; you will have to select among the given docker components that you wish to install. Here, you can also choose the default ones.

Once the installation is successful then you will have three shortcuts on your desktop.

Then, when you will try to install Docker Quick Start terminal then it will try to install default machine. However, at this point of time; you may receive an error regarding virtualization disabled.

In order to enable it; just restart the Docker Quick Start Terminal and then you will be easily able to install the Docker machine and then Docker VirtualBox Manager will open.

This terminal will have a special environment instead of the same Windows Command Prompt.

Developing a new machine with Windows via Command Prompt:

Once you install Docker on Windows then you may wish to create a new Docker machine as per the steps given below:

  1. To create a new Docker machine with Windows Command Prompt then you must set the ssh.exe in the PATH environment variable.

    Command: set PATH=%PATH%; C:\Program Files\Git\bin

  2. Now, the same virtualbox driver can be used to create a new machine known as php-machine.

    Command: docker-machine create --drivervirtualbox php-machine

  3. Now, the Docker will be connected to PHP machine.
  4. Here, you will get new command.

    The existing Docker machines can be listed with this command.
    Command: docker-machine ls

    With this command; the Docker machine can be easily activated and deactivated.

How base docker image can be used to run applications on Apache?

Once the docker machine is created, the Apache version with less configurations can be installed to run PHP. Here, the configuration must be installed in the docker machine known as PHP machine.

Such applications can be installed via images in a Docker. Now, here you might think what is a Docker image?

Docker image: It is a type of document that contains all the instructions any user can call on the command line to develop an image. Docker files are generally written for developing an Apache + PHP docker image. It is advisable to visit Docker Hub before creating one.

Take Away:

Well, again a question “What is Docker Hub?” [The blog of 13th April 2016 is tobe hyperlinked here. The answer to this question will be available in the next part of “Docker with PHP”. Till then, follow these commands and try to install a Docker machine.

For more such amazing news and updates about PHP; stay tuned to Softqube Technologies that offers cost effective PHP Development in India.

How to Develop a Simple Joomla Website?

There are various platforms available today that can be used for website development. Here, in this blog post; we will show how to set up a website with popular web design as well as development platform; Joomla.

We all are aware that it is one of the longest and most famous Free open source platform next to WordPress. Joomla; today is known for various innovations in PHP/MYSQL which includes WordPress, Drupal, Magento and lots more.

Joomla is considered as the second most popular content management system after WordPress. This was actually the first CMS to be completely responsive for visitors and administrators.

It is responsive because Joomla team uses Bootstrap framework which makes Joomla 3 attractive for front end designers as well as makes it easy for developers to create interfaces for their code.

Website Development with Joomla

The installation process of Joomla 3 is much faster as compared to other platforms. It’s just the task of few minutes.

Process of developing a website on Joomla:

First of all, download the latest version of Joomla from Joomla’s website. At present; the latest version is Joomla 3. Click on “Download Joomla 3.3” and now it’s time for its installation.

There are two ways to do so and for both; you will need hosting and domain name. One click installation takes at the most 3 minutes and the manual installation process takes 20- 30 minutes.

By default, the Joomla website will look like a blog that has 4 posts; just click on the post title to view full content. It will also have a side bar that has typical blog features like as list of recent posts, blog roll as well as a complete list of Most Read Posts.

As we discussed earlier, Joomla now uses Bootstrap framework; just reduce the size of your browser so that the image and the side bar slides under the homepage posts.

Logging in to the Joomla website:

Here, we will take a look at the admin interface of Joomla 3. Just use the word”/administrator/” to the website URL. Login using the admin username and password that you had created during the installation process.

The main toolbar at the top of the screen has everything that is required to manage your site. The Control Panel that you see after first logging in has useful shortcuts as well as information that is based on main toolbar.

Bootstrap offers mobile friendly interface.

Adding the website Content:

In the main toolbar, go to Content and then Article Manager. Here, we have three things to do in order to publish the first article.

  • Title : Article Title
  • Category : Blog
  • Body text: Add any text

Now, you can add images to Joomla articles by using Image button. Click Image and you will get a pop up window with existing images on the website. For any particular image; Click on the image to select it and then choose “Insert”.

Here, the sidebar will have most important options for each article. You can either publish the article or keep it as draft. If you get it registered then logged-in users can only see it.

You can also organize the content with hierarchical categories as well as free form tags.

Joomla website design:

Website once developed can be given a wonderful design with the use of Joomla templates. These will be available in the main toolbar – Extensions > Template Manager.

Go to My Default Style and then Options tab. Here, you can change the text and background colours of your template; just upload a new logo and add Google fonts.

Joomla main features are known as Components. These have own link in the toolbar. The default extensions include Contacts, Joomla update and Tags. Any major feature that you add to Joomla will be available in “Components” Menu.

Now, let’s learn to control our sidebars.

Inside Extensions, Template Manager; click on “Options” button at the top of screen. You will see the names of different regions where you modules can be placed.

Wind Up

Now, that you have read this post completely; you can easily develop a website on this platform. Let us know how useful this blog post was for you.

Wish to know more about Joomla? Or wish to get an amazing website developed on Joomla! Then stay tuned to Softqube Technologies; Joomla website Development Company in India that offers web development services at affordable costs.

How to Read CSV Data in PHP Array?

The CSV (“Comma Separated Values”) file format is an oldest form which is still used to exchange the data between different applications. It is been around for far longer personal computers. These CSV files are often used to import data from one application into another application like as MS Excel into database.

The import process is held with any programming language but here are few reasons to use PHP as one of the best for this purpose. Here, we will write a PHP Script which reads in a CSV file that transforms its contents into a multi dimensional array which is then to be inserted in WordPress database.

CSV Format:

The name CSV indicates the use of comma in order to separate data fields. CSV format can vary a little bit. Hence, one must not assume anything; just open the text editor and ensure that the format matches your expectations.

The field delimiter can be any character from tabs to the “I” symbol. Further, fields may be enclosed within single or double quotation marks and at times, the first record is a header that contains a list of field names.

One such sample file created by Excel’s Save As Command is given below. This includes header files and uses standard comma delimiter:


Store,Opening Hour Mon-Wed,OH Thurs,OH Fri,OH Sat,Sun
Aberdeen Beach,11:30-22:00,11:30-22:00,11:30-22:30,11:30-22:30,11:30-22:00
Basildon,12:00-22:30,12:00-22:30,12:00-23:00,12:00-23:00,12:00-22:30
Bath,12:00-22:30,12:00-22:30,12:00-23:00,12:00-23:00,11:30-22:30
Birmingham,11:30-23:00,11:30-23:00,11:30-23:00,11:30-23:00,11:30-23:00
Bluewater,12:00-22:30,12:00-22:30,12:00-23:00,12:00-23:00,12:00-22:30
Braehead,11:30-22:30,11:30-22:30,11:30-23:00,11:30-23:00,11:30-22:00
Braintree,12:00-22:30,12:00-22:30,12:00-23:00,12:00-23:00,12:00-22:00
...

Transforming File Entries into Associative Arrays:

PHP 5 is very well suited for reading in CSV files. With the file_get_contents() function, one can load the file contents in a string variable. Later, Explode () splits every file line into an array. Further, one needs to remove headers from the file using array_shift () function.

This is then fed into str_getcsv(). This is a specialized function that can be used for parsing CSV string into numerically indexed array. Here, one uses foreach loop in order to create a key for each field from the headers using array_combine ():


$csv = file_get_contents('./input_data.csv', FILE_USE_INCLUDE_PATH);
$lines = explode("\n", $csv);
//remove the first element from the array
$head = str_getcsv(array_shift($lines));

$data = array();
foreach ($lines as $line) {
$data[] = array_combine($head, str_getcsv($line));
}

This code will produce the following array construct:


array(72) {
[0]=>
array(6) {
["Store"]=>
string(14) "Aberdeen Beach"
["Opening Hour Mon-Wed"]=>
string(11) "11:30-22:00"
["OH Thurs"]=>
string(11) "11:30-22:00"
["OH Fri"]=>
string(11) "11:30-22:30"
["OH Sat"]=>
string(11) "11:30-22:30"
["Sun"]=>
string(11) "11:30-22:00"
}
[1]=>
array(6) {
["Store"]=>
string(8) "Basildon"
["Opening Hour Mon-Wed"]=>
string(11) "12:00-22:30"
["OH Thurs"]=>
string(11) "12:00-22:30"
["OH Fri"]=>
string(11) "12:00-23:00"
["OH Sat"]=>
string(11) "12:00-23:00"
["Sun"]=>
string(11) "12:00-22:30"
}
[2]=>
array(6) {
["Store"]=>
string(4) "Bath"
["Opening Hour Mon-Wed"]=>
string(11) "12:00-22:30"
["OH Thurs"]=>
string(11) "12:00-22:30"
["OH Fri"]=>
string(11) "12:00-23:00"
["OH Sat"]=>
string(11) "12:00-23:00"
["Sun"]=>
string(11) "11:30-22:30"
}
[3]=>
array(6) {
["Store"]=>
string(10) "Birmingham"
["Opening Hour Mon-Wed"]=>
string(11) "11:30-23:00"
["OH Thurs"]=>
string(11) "11:30-23:00"
["OH Fri"]=>
string(11) "11:30-23:00"
["OH Sat"]=>
string(11) "11:30-23:00"
["Sun"]=>
string(11) "11:30-23:00"
}
[4]=>
array(6) {
["Store"]=>
string(9) "Bluewater"
["Opening Hour Mon-Wed"]=>
string(11) "12:00-22:30"
["OH Thurs"]=>
string(11) "12:00-22:30"
["OH Fri"]=>
string(11) "12:00-23:00"
["OH Sat"]=>
string(11) "12:00-23:00"
["Sun"]=>
string(11) "12:00-22:30"
}
[5]=>
array(6) {
["Store"]=>
string(8) "Braehead"
["Opening Hour Mon-Wed"]=>
string(11) "11:30-22:30"
["OH Thurs"]=>
string(11) "11:30-22:30"
["OH Fri"]=>
string(11) "11:30-23:00"
["OH Sat"]=>
string(11) "11:30-23:00"
["Sun"]=>
string(11) "11:30-22:00"
}
//...
}

How to work with imported data?

When the CSV data is loaded into an array, then we are ready to load the data into system. Here, in this particular case; it involves fetching the post ID so that we can save location’s opening times as WordPress meta data.

Location name must be sanitized before inclusion in a query because it is not always that we can trust the external data. Each location array is passed to array_slice () function in order to separate the opening times from store name.

Inside foreach loop, data is formatted into HTML in order to display the label (array key), colon (: ), value on each line.

Take Away

Apart from specialized functions like as str_getcsv(), there’s another distinct advantage of using PHP Script to import CSV data is that it is very easy to set up as a cron job which runs at a given interval.
The file_get contents() function can accept a file URL so that it can retrieve every file directly from external partner’s server.

So, from now after reading this post; we are sure that you can easily import CSV data to PHP Array. Let us know your feedback about this and for more such news related to PHP, get in touch with Softqube Technologies providing PHP development in India at affordable costs.

Let’s Work together!

"*" indicates required fields

Drop files here or
Max. file size: 5 MB, Max. files: 2.
    This field is for validation purposes and should be left unchanged.